close

Tatum Brooks

Diet Tips

How to Add Protein to Your Favorite Carbs Without Ruining the Taste

Most advice around boosting dietary protein starts with a quiet insult to your palate: swap out your favorite carbohydrates for pale imitations. You are told to replace pasta with watery zucchini ribbons, trade fluffy jasmine rice for sulfurous cauliflower crumbles, or choke down dry, gritty noodles made entirely of compressed beans.
These substitutions rarely satisfy a genuine craving for comfort food. Carbohydrates are not just fuel; they provide specific textures, aromas, and nostalgic satisfaction that vegetable impostors cannot replicate.
Fortunately, you do not have to banish real pasta, warm bread, or tender potatoes to hit your daily macronutrient targets. By utilizing subtle culinary techniques, culinary chemistry, and neutral, nutrient-dense ingredients, you can significantly elevate the protein content of your favorite carbohydrate-heavy meals without compromising the flavors and textures you love.

The Problem with Traditional Protein Substitutions

The fitness industry often treats carbohydrates as empty vehicles that must be minimized or completely eliminated. When people attempt to meet higher protein goals—whether for satiety, muscle recovery, or metabolic health—they often swing between two extremes: eating dry chicken breast alongside plain white rice, or buying heavily processed alternative products.
The trouble with specialized “high-protein” packaged carbs, such as certain pulse-based pastas or low-carb flatbreads, comes down to mouthfeel. Chickpea and lentil pastas often release excess starch, turning mushy within seconds of boiling, while leaving behind a distinct earthy aftertaste that clashes with delicate sauces.
A far better approach is stealth fortification. Instead of replacing the carbohydrate itself, you integrate protein directly into the cooking liquid, sauce, binder, or fat source of the meal. This preserves the chew of real pasta, the fluffiness of good rice, and the silkiness of mashed potatoes while turning a low-protein meal into a balanced powerhouse.

Elevating Pasta Night Without High-Protein Noodles

Pasta is perhaps the easiest carbohydrate to fortify because sauces are naturally emulsified, seasoned, and sauced across every strand.

The Blended Cottage Cheese Secret

If the idea of warm cottage cheese sounds unappealing, you have likely never blended it smooth. When run through a high-speed blender or food processor, whole-milk or low-fat cottage cheese transforms into a velvety, neutral cream base that mimics heavy cream or ricotta.
Whisk half a cup of blended cottage cheese directly into warm marinara sauce just before serving. It cuts the tomato acidity, creates a rich pink sauce reminiscent of a classic vodka sauce, and quietly deposits 14 grams of protein into your bowl without altering the flavor profile. The key is to remove the sauce from direct high heat before stirring it in to prevent the proteins from curdling.

Silken Tofu in Creamy Sauces

Silken tofu is culinary camouflage. Unlike firm tofu, the silken variety has an extraordinarily smooth, custard-like texture and virtually zero flavor. Blending a block of silken tofu with garlic, nutritional yeast, a splash of pasta water, and grated Parmesan yields a luxurious Alfredo-style sauce that coats fettuccine beautifully while delivering a clean, plant-based protein boost.

Enriching with Pasteurized Egg Whites

Borrow a technique from traditional Italian carbonara. By whisking pasteurized liquid egg whites with a single whole egg and freshly grated pecorino, you create a rich liaison. Tossed vigorously with hot, freshly drained pasta off the heat, the residual steam gently cooks the egg mixture into a glossy, clingy glaze rather than scrambled bits, adding substantial protein without a chalky supplement in sight.

Upgrading Rice and Grains

White and brown rice are culinary staples across the globe, but on their own, they offer modest amounts of protein. You can change their nutritional profile during both the simmering and finishing stages.

Simmering in Bone Broth

The simplest upgrade requires no extra preparation time: replace cooking water with high-quality chicken or beef bone broth. As the rice grains absorb the liquid, they soak up naturally occurring gelatin and collagen. One cup of cooked rice simmered in rich bone broth gains roughly 8 to 10 grams of protein, along with a deeper, savory depth of flavor that complements almost any protein topping.

Folding in Hemp Hearts

Hemp hearts are tiny, soft, and carry a mild, nutty flavor that blends seamlessly into textured grains. Folding two tablespoons of raw hemp seeds into cooked jasmine rice, quinoa, or farro right before serving adds roughly 6 grams of complete plant protein and healthy fats. The light crunch mimics the natural texture of grain husks, making them completely inconspicuous.

The Half-and-Half Pulse Technique

If you want to cut carbohydrate density slightly without losing the feeling of eating real rice, avoid plain cauliflower rice. Instead, mix cooked white rice 50/50 with steamed riced edamame or tender French green lentils. The textures harmonize far better than watery vegetables, retaining a satisfying bite while doubling the protein per serving.

Transforming Mashed Potatoes into a Substantial Side

Standard mashed potatoes rely heavily on butter, milk, or heavy cream to achieve richness. While delicious, this combination is high in fat and low in protein.
Replace half of the traditional butter and milk with plain nonfat or low-fat Greek yogurt. The yogurt delivers a pleasant, subtle tang identical to sour cream, while yielding an ultra-creamy texture and adding several grams of protein per scoop.
For an even milder taste, whipped cottage cheese works just as well. Whip the cottage cheese until completely glossy, then fold it into your hot, riced Yukon gold potatoes along with roasted garlic, salt, and a small pat of real butter for aroma. The potatoes remain decadent, fluffy, and savory, completely hiding the protein source beneath classic comfort food flavors.

Reinventing Morning Oats

Oatmeal is comforting and fibrous, but an all-carb breakfast often leads to an energy crash by mid-morning. Many people try stirring whey protein powder into hot oats, only to end up with a rubbery, gritty sludge.

The Stovetop Egg White Custard

To create creamy, voluminous oats that keep you full for hours, turn to liquid egg whites. Prepare your rolled oats on the stovetop with water or milk as usual. Once the oats begin to bubble and soften, turn the heat to medium-low and slowly pour in one-third to one-half cup of liquid egg whites while whisking constantly.
Cook for an additional two minutes, stirring steadily. The egg whites do not separate or taste like fried eggs; instead, they aerate the oatmeal, creating a light, soufflé-like, custardy texture that enhances toppings like berries, cinnamon, and maple syrup.

Unflavored Collagen Peptides

Unlike whey or plant protein powders, unflavored hydrolyzed collagen peptides dissolve completely in hot liquids without thickening them or adding flavor. Stirring a scoop of collagen directly into warm oatmeal or cream of rice boosts the protein content by 10 to 20 grams while leaving the taste, sweetness, and consistency completely untouched.

Golden Rules for Fortifying Carbs

When experimenting with your own recipes, keep three fundamental principles in mind to ensure your meals remain delicious:
First, watch your cooking temperatures. Dairy proteins like Greek yogurt, cottage cheese, and ricotta will separate and turn grainy if subjected to a rolling boil. Always stir them into sauces or starches off the heat, allowing the ambient warmth of the food to bring them to serving temperature.
Second, compensate with seasoning. Protein dilutes salt perception. When you introduce unflavored egg whites, tofu, or broths into a carbohydrate dish, you increase the overall volume of the meal. Taste your food near the end of cooking and adjust your salt, acid, and herbs accordingly to keep the flavors vibrant.
Third, match the texture. Never force a powdery ingredient into a smooth dish or a wet ingredient into a crispy one. Pair creamy proteins with creamy sauces, broths with simmered grains, and neutral powders with hot cereals. By working with the natural architecture of the food rather than fighting it, you get to keep the comforting meals you love while effortlessly meeting your nutritional goals.

read more
Dental Care

Sleep Dentistry & Dental Anxiety: Stress-Free Care for Nervous Patients

For many individuals, the mere thought of a dental chair triggers a wave of intense nervousness. This profound dread frequently leads to skipped appointments, neglected oral hygiene, and eventually, severe dental complications. Fortunately, modern dental medicine offers a transformative solution designed to replace panic with peace of mind. Sleep dentistry, clinically known as sedation dentistry, has emerged as a crucial bridge for patients struggling to access essential treatments due to deep-seated phobias. By altering the sensory experience of a clinical visit, it ensures that oral healthcare is no longer a source of trauma but a manageable, routine part of a healthy lifestyle.

Understanding Dental Phobia and Avoidance

Dental anxiety exists on a broad, complex spectrum, ranging from mild butterflies before a routine scale and clean to debilitating terror that completely prevents any clinical intervention. The roots of this fear are often deeply personal, frequently stemming from a traumatic childhood dental experience, a fear of needles, or an intense dislike of the sounds and sensations associated with dental drills. Some individuals also experience a profound sense of vulnerability or shame regarding the condition of their teeth, which further delays their willingness to seek professional help.

When fear takes control, individuals routinely postpone preventative care. This prolonged avoidance creates a highly detrimental cycle where minor, easily treatable issues—such as micro-cavities or early-stage gingivitis—escalate into painful, acute conditions requiring extensive, invasive treatments. This escalation ultimately reinforces the patient’s original phobia, convincing them that the dentist is exclusively a place of discomfort. Breaking this cycle requires a fundamental shift in how treatment is delivered.

The Mechanism of Sleep Dentistry

Sedation dentistry utilises specific pharmacological agents to help patients relax deeply during their clinical procedures. Contrary to popular belief, sleep dentistry encompasses several distinct levels of sedation, which are tailored precisely to the patient’s anxiety severity, medical history, and the overall complexity of the scheduled treatment.

  • Mild Sedation: This typically involves relative analgesia, commonly referred to as laughing gas, which is inhaled to induce a calm, slightly euphoric state while leaving the patient fully awake and cooperative.
  • Moderate Conscious Sedation: Administered via oral medication or intravenous (IV) lines, this deeper level allows patients to remain conscious and able to respond to simple commands, though they exist in a state of profound relaxation and typically experience an altered perception of time.
  • Deep Sedation and General Anaesthesia: For extreme cases of phobia, severe gag reflexes, or lengthy surgical reconstructions, general anaesthesia is applied. Under these advanced medical methods, patients remain blissfully unaware of the treatment, waking up with absolutely no memory of the procedure itself.

The Hidden Lifestyle Benefits of Sleep Dentistry

Beyond the obvious advantage of completing a dental procedure without emotional distress, opting for sedation methods unlocks numerous advantages that extend into a patient’s broader well-being. Exploring the hidden lifestyle benefits of sleep dentistry reveals how this comprehensive approach fundamentally changes an individual’s relationship with healthcare.

For one, it allows multiple, highly complex procedures—such as root canals, wisdom teeth extractions, and dental implant placements—to be consolidated into a single, streamlined appointment. This dramatically reduces the need for multiple stressful trips to the clinic and minimises time taken off from work or family commitments. Furthermore, by eliminating the physiological stress response, adrenaline spikes, and muscle bracing during treatment, patients experience significantly less physical fatigue, reduced post-operative soreness, and a much faster overall recovery period.

Restoring Confidence and Ultimate Peace of Mind

The ultimate goal of sedation care is to empower patients, allowing them to reclaim authority over their personal well-being. When the barrier of pain and anxiety is entirely removed, individuals can finally address long-standing cosmetic and structural dental issues that they may have hidden for decades.

Resolving chronic halitosis, repairing severely broken teeth, and restoring a bright, functional smile does wonders for an individual’s self-esteem. Social interactions become genuinely enjoyable rather than anxiety-inducing, and professional confidence is completely restored. Sleep dentistry successfully changes the narrative from one of endurance, guilt, and suffering to one of comfort, proactive health management, and true self-care.

Cultivating a New Pattern of Lifelong Oral Health

Overcoming clinical anxiety is a gradual process, but sleep dentistry acts as an excellent catalyst for long-term behavioural change. When a nervous patient experiences a completely pain-free, serene dental session, their subconscious brain begins to reframe the dental environment as a safe, supportive space rather than a place of danger.

Over time, this positive reinforcement diminishes the anticipatory dread that usually precedes an annual check-up. In a world where anxiety often dictates health decisions, choosing a sedation-supported pathway helps patients break free from fear, paving the way for regular preventive care, stronger clinician-patient relationships, and a lifetime of exceptional oral health.

read more
Disease

How to Manage Blood Sugar Spikes When You Have a Cold or Flu

Waking up with a raspy throat, aching joints, and a fever is miserable enough on its own. For anyone living with diabetes, however, a seasonal bug brings an added layer of frustration: a morning glucose reading stubbornly sitting above 240 mg/dL before a single bite of food has touched your lips.
When your immune system goes to war against a rhinovirus or influenza, your body treats the infection as an acute physiological crisis. Even if you have zero appetite and spend the day curled under a blanket, your blood sugar can surge to heights you normally only see after eating half a pizza. Managing this illness-induced volatility requires shifting from your standard daily routine to a focused sick-day protocol.

Why Common Infections Cause Blood Glucose to Surge

Understanding why your numbers spike during an infection is the first step toward regaining control. When a virus takes hold, your adrenal glands flood your bloodstream with counter-regulatory stress hormones, primarily cortisol and epinephrine.
These hormones serve an evolutionary purpose: they mobilize stored energy so your immune system has immediate fuel to fight off pathogens. They prompt your liver to rapidly convert stored glycogen into active glucose and pump it into your circulation. At the same time, cortisol makes muscle and fat cells temporarily resistant to insulin.
This creates a difficult double-bind. Your liver is producing excess sugar around the clock, while your cells are actively blocking insulin from clearing that sugar from your bloodstream. Even if you are eating virtually nothing, your internal fuel reserves will keep your blood sugar elevated until the inflammatory storm begins to subside.

Navigating the Medicine Cabinet: Hidden Sugars and Stimulants

One of the most frequent missteps during a cold occurs in the medicine aisle. Over-the-counter remedies designed to soothe aches and suppress coughs can actively sabotage your glycemic control if you do not examine the fine print.

Liquid Elixirs and Lozenges

Traditional liquid cough syrups, nighttime multi-symptom cold medications, and throat lozenges are frequently packed with high-fructose corn syrup, sucrose, or honey to mask bitter active ingredients. A single standard dose of a conventional cough syrup can deliver 10 to 15 grams of pure, fast-absorbing carbohydrates. If you are taking that dose every four hours, you are essentially drinking liquid sugar around the clock. Always look for formulations explicitly labeled sugar-free, or switch to caplet and tablet forms of the same active ingredients.

Oral Decongestants

Liquid sugars are not the only threat. Stimulant decongestants, specifically pseudoephedrine and phenylephrine, mimic the body’s fight-or-flight response. While they effectively shrink swollen blood vessels in your nasal passages, they also elevate heart rate, raise blood pressure, and trigger an extra release of stored glucose from the liver.
If you are already dealing with stubborn illness-related highs, oral decongestants can drive those numbers higher. Consider relying instead on saline nasal rinses, plain guaifenesin to thin mucus, topical nasal sprays used strictly within recommended time limits, or first-generation antihistamines that do not exert the same stimulant effect.

Monitoring Strategies for Sick Days

When your metabolism is destabilized by illness, passive monitoring is no longer sufficient. Your glucose trends can shift rapidly based on rising body temperatures, dehydration, and medication timing.
Check your blood sugar every two to three hours, including at least once during the night. If you use a continuous glucose monitor (CGM), remember that severe dehydration can impair the accuracy of interstitial fluid readings. Furthermore, high doses of certain fever reducers, particularly acetaminophen, can interact with older CGM sensor enzymes and create falsely elevated readings. If a sensor reading feels disconnected from how you physically feel, verify it with a standard fingerstick blood glucose meter before administering corrective medication.
Ketone surveillance is just as essential, particularly for those with Type 1 diabetes or advanced insulin-dependent Type 2 diabetes. When your body cannot utilize glucose due to acute insulin resistance, it begins breaking down fat for fuel at an accelerated pace, generating acidic byproducts known as ketones. Test your urine or blood for ketones every four to six hours if your blood sugar stays above 240 mg/dL, or immediately if you experience nausea or persistent vomiting. The presence of moderate to large ketones signals that your body is starving for effective insulin, regardless of what the blood sugar number says.

The Hydration and Nutrition Balancing Act

Dehydration is the quiet accelerator of blood sugar spikes. As glucose levels climb past your renal threshold, your kidneys attempt to dump the excess sugar through frequent urination. If you do not replace those lost fluids, your blood volume drops, concentrating the glucose remaining in your vessels and driving your readings even higher.
Aim to consume roughly eight ounces of fluid every waking hour. When your blood sugar is running high, stick strictly to zero-calorie options:
  • Plain water filtered or infused with lemon peel
  • Clear broths rich in sodium to replenish depleted electrolytes
  • Unsweetened herbal teas such as peppermint or chamomile to calm an irritated stomach
However, a different challenge arises when a fever kills your appetite entirely, or when stomach upset makes solid food intolerable. If your blood glucose begins to drop below your target range due to active background insulin, you must switch tactics. Keep small portions of easily digestible, mild carbohydrates on hand. Sipping on diluted fruit juice, regular ginger ale, or nibbling on saltine crackers provides a controlled trickle of glucose. This prevents hypoglycemia while ensuring your liver is not forced into emergency starvation ketosis.

Adjusting Insulin Without Stacking Doses

The most dangerous instinct when sick is to withhold your daily long-acting or basal insulin because you are not eating full meals. Your basal insulin exists to keep your liver’s baseline glucose output in check. Stopping it during an illness is the quickest route to diabetic ketoacidosis.
Work with the sick-day guidelines previously mapped out by your physician. You will likely find that your body requires larger, more frequent correction boluses of rapid-acting insulin to overcome viral insulin resistance.
The vital rule here is to avoid insulin stacking. Because fever slows gastric emptying and dehydration alters subcutaneous insulin absorption, a correction dose may take significantly longer to show its full effect. Wait at least three to four hours before taking an additional corrective dose unless your medical provider has instructed you otherwise. Stacking doses out of impatience can turn a stubborn high into a sudden, precipitous crash while your energy to treat a low is at its absolute lowest.

When to Seek Emergency Medical Support

A cold or flu usually runs its course in three to seven days, but complications can develop swiftly when metabolic control slips. You should have a clear threshold for when home care ends and hospital intervention begins.
Contact your healthcare provider or head to an urgent care or emergency room if:
  • You cannot keep down fluids or food for more than four hours due to persistent vomiting.
  • Your blood sugar remains above 250 to 300 mg/dL despite administering two consecutive correction doses.
  • Urine test strips show moderate or large ketones that do not decrease after supplemental insulin and aggressive fluid intake.
  • You experience labored, fruity-smelling breath, extreme dizziness upon standing, or profound confusion.
Treating an illness when you have diabetes requires deliberate, proactive management. By aggressively hydrating, dodging hidden sugars in common cold remedies, monitoring your numbers on an accelerated schedule, and letting stress hormones settle, you can guide your body through the bug without letting blood sugar complications take over the recovery process.
read more
Dental Care

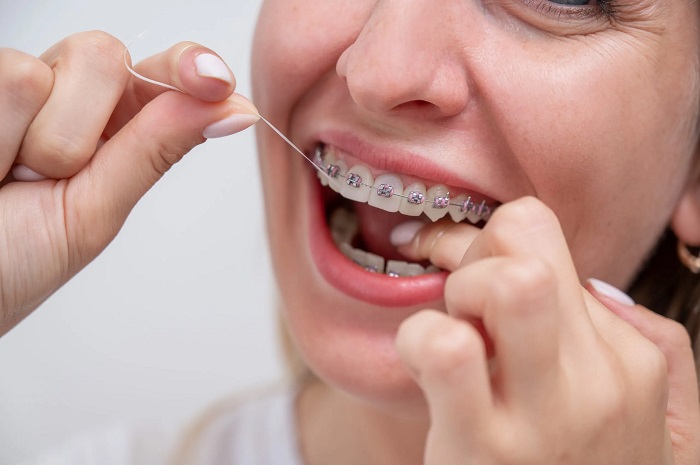
How to Keep Your Teeth From Staining Around Your Braces Brackets

The day your braces come off is supposed to be a celebration. You picture running your tongue over smooth, perfectly straight teeth and seeing a bright, uniform smile in the mirror. For too many orthodontic patients, however, that reveal comes with an unwelcome shock: pale, chalky frames or dull yellow outlines marking the exact spot where each bracket sat for the past two years.
These marks, often called bracket halos, are among the most common complications of orthodontic treatment. The hardware that straightens your teeth also creates hundreds of tiny ledges, corners, and crevices where plaque loves to hide. Preventing those discolored borders does not mean you have to maintain an impossible standard of perfection. It simply requires understanding how enamel breaks down around brackets and building a daily routine that actively defends those vulnerable margins.

White Spot Lesions vs. Surface Stains: Knowing the Real Culprit

When people talk about braces stains, they usually lump two very different problems into the same category. Understanding which one you are fighting determines how you protect your teeth.
Surface stains are extrinsic. They come from dark pigments in coffee, black tea, marinara sauce, red wine, and berries soaking into the sticky film of plaque that settles along the edges of your brackets. While surface stains look unattractive, a dental hygienist can usually polish them away with professional equipment once your hardware is removed.
The far more serious threat is decalcification, which creates permanent white spot lesions. These chalky, opaque patches are not surface discolorations. They represent the earliest stage of tooth decay. When plaque sits undisturbed around bracket borders, the bacteria inside it consume leftover sugars and produce continuous bursts of lactic acid. That acid leaches vital minerals like calcium and phosphate straight out of the enamel. Once the mineral lattice beneath the surface becomes porous, light reflects through it differently, leaving behind an indelible white scar. If left unchecked, these lesions eventually collapse into full cavities.

The Whitening Mistake That Makes Discoloration Worse

When patients notice slight yellowing or shadowing around their braces, their first impulse is often to reach for whitening strips, bleaching pens, or abrasive charcoal toothpastes. This is one of the worst mistakes you can make during active orthodontic treatment.
Whitening products only penetrate the exposed tooth structure. The square of enamel resting beneath the composite bonding resin holding your bracket is completely shielded from the bleaching agent. If you whiten your teeth while wearing braces, you create a two-tone checkerboard effect. The exposed surfaces will lighten, but when the orthodontist removes the brackets, the enamel underneath will remain its original, darker shade.
Furthermore, many commercial whitening toothpastes rely on coarse abrasives to scrub away surface film. On braced teeth, these abrasive particles scratch the edges of resin cement, wear down clear ceramic brackets, and create microscopic grooves in the enamel where new plaque can anchor even more aggressively. Put the whitening products in a drawer until your treatment is completely finished.

The Two-Angle Brushing Technique

A standard back-and-forth brushing motion is almost useless against orthodontic hardware. Flat bristles simply glide across the top faces of the brackets, completely missing the narrow corridors between the brackets and the gumline. To clean the margins where demineralization actually happens, you must alter your approach.
Hold your soft-bristled or electric toothbrush at a 45-degree angle pointing downward toward the top of the bracket, right along the gumline. Use small, circular vibrations to work the bristle tips under the archwire and against the upper edge of the bracket base. Once you have cleared the top perimeter of every tooth, switch the brush to a 45-degree angle pointing upward from the biting edge. This angle forces the bristles beneath the lower margin of the bracket, where food debris tends to drop and collect after meals.
Dedicate at least two full minutes to this process morning and night. If you use a manual toothbrush, consider switching to an oscillating electric model designed with an orthodontic brush head. The high-speed rotation generates fluid dynamics that help flush out sticky biofilm from spaces that standard nylon bristles cannot physically reach.

Essential Tools Beyond the Standard Toothbrush

Even the best brushing technique cannot clear every pocket of plaque around brackets and wires. If you want to keep your enamel pristine, your daily kit needs a few supplementary tools.

The Interdental Proxabrush

An interdental brush looks like a miniature pipe cleaner on a thin plastic handle, and it is the single most effective tool for preventing bracket halos. Slide the proxabrush vertically beneath the archwire between each bracket, brushing up and down against the sides of the metal. Doing this sweeps away the stubborn, glue-like plaque that sits directly against the adhesive perimeter, an area normal brush heads consistently bridge right over.

Hydrostatic Flushing vs. Traditional String

Many patients abandon flossing entirely once braces are placed because threading string around thirty brackets feels exhausting. While a water flosser is a fantastic addition to your routine, it is not a complete replacement for manual flossing. A water flosser uses pressurized pulses to dislodge large food chunks and dilute bacterial colonies around the gingival margin, but it cannot exert the mechanical friction required to wipe away sticky biofilm. Combine both methods: use a water flosser after meals for quick cleanup, and use a dedicated orthodontic floss threader or stiff-ended floss pick once every night before bed.

Remineralizing Your Enamel From the Outside In

Because plaque acid constantly pulls minerals out of your enamel, your daily hygiene routine must actively put those minerals back. You cannot reverse a full cavity, but you can remineralize early microscopic demineralization before it turns into an irreversible white scar.
Incorporate an alcohol-free sodium fluoride mouthwash into your daily regimen, preferably right before bed. Rinse thoroughly for one full minute after brushing, and spit the excess out without immediately following it with water. Leaving a light residual film of fluoride on your teeth allows the mineral ions to integrate directly into the crystalline enamel structure overnight, forming a acid-resistant shield known as fluorapatite.
For patients at high risk of staining or decalcification, talk to your dentist or orthodontist about prescription-strength pastes containing 5,000 parts per million fluoride, or remineralizing agents featuring nano-hydroxyapatite. Nano-hydroxyapatite particles are biochemically identical to natural tooth structure, allowing them to physically slot into microscopic enamel fissures and restore surface density around vulnerable bracket borders.

How Dietary Timing Protects Bracket Margins

Most orthodontic dietary advice focuses on avoiding hard, crunchy foods that snap brackets off the teeth. However, preventing stains is much more about the frequency of your eating habits than avoiding hard crusts.
Every time you consume fermentable carbohydrates or acidic drinks, the pH in your mouth plummets below 5.5, triggering active demineralization. It takes your saliva roughly twenty to thirty minutes of natural buffering to restore a neutral pH. If you sip an iced caramel macchiato, a sports drink, or a flavored sparkling water at your desk across four hours, your teeth spend that entire morning submerged in a destructive acid bath.
Consolidate your treats into short meal windows rather than grazing throughout the day. When you finish an acidic drink or snack, immediately rinse your mouth with plain tap water to wash away lingering sugars and neutralize the environment. Crucially, wait at least thirty minutes before brushing after consuming something acidic. Acid temporarily softens the outer micro-layer of enamel; scrubbing that softened surface immediately with a toothbrush will strip away enamel faster than plaque ever could.

Catching Changes Before Debonding Day

Keep a close eye on your bracket perimeters in a well-lit mirror once a week. If you notice chalky matte borders, persistent bleeding along the gums, or dull discoloration creeping around the edges of your hardware, bring it up at your next adjustment visit. Your orthodontist can apply an in-office fluoride varnish to halt the progression of early lesions before they deepen.
Never skip your regular cleanings with your general family dentist while wearing braces. Orthodontists focus on the mechanics of bone remodeling and tooth alignment; your dental hygienist remains your front-line defender for scaling away stubborn tartar, assessing gum health, and ensuring that the straight smile you reveal on debonding day is clean, healthy, and uniformly bright
read more
Fitness

The Role of Instructor Cueing in Maximising Spin Class Outcomes

A spin class without skilled instructor cueing is simply a room full of people on stationary bikes with music playing. The instructor’s voice is the primary tool through which a group training session is transformed from an individual effort into a coached, structured experience that produces specific physiological adaptations. Yet the quality of cueing varies enormously across Singapore’s fitness landscape, and members who understand what good cueing sounds like are far better positioned to evaluate and benefit from the studios they choose.

The best spin studio Singapore experiences are distinguished as much by the quality of verbal instruction as by the quality of the equipment. These two variables are inseparable in determining what a member actually gets from a session.

What Cueing Actually Is

Cueing in a fitness context refers to verbal or visual instructions that guide movement, effort, or focus during a training session. In spin specifically, cueing operates across several dimensions simultaneously:

  • Technical cues that guide rider position, pedalling mechanics, and resistance management
  • Intensity cues that communicate the target effort level for each session segment
  • Motivational cues that maintain engagement and push effort during demanding segments
  • Safety cues that correct dangerous patterns or prevent injury in real time
  • Educational cues that explain the physiological purpose of what is being done

Excellent instructors deploy all five types of cueing purposefully throughout a session. Weaker instructors rely primarily on motivational cueing, which is the easiest to deliver but the least specifically useful for producing training outcomes.

Technical Cueing and Its Effect on Performance

Technical cues are the most directly performance-relevant type of instruction in a spin class. They address the mechanics of how force is applied to the pedals, how the rider’s body position is managed, and how resistance and cadence interact.

Common technical cues that improve performance include:

  • Pedalling in circles rather than pushing down: directing attention to the complete 360-degree pedal stroke rather than just the downstroke improves power application efficiency
  • Relaxing the upper body and grip: tension in the hands, arms, and shoulders wastes energy that should be directed to the legs
  • Hip position over the saddle: anterior pelvic tilt during climbing segments recruits the gluteal musculature more effectively, improving power output and reducing knee strain
  • Heel position through the pedal stroke: maintaining a flat or slightly heel-down foot position through the bottom of the stroke protects the Achilles tendon and improves force transmission

These cues are specific, actionable, and immediately applicable. A member who receives and applies them correctly during a session gets meaningfully more from the same physical effort than one who rides without this guidance.

The Timing and Delivery of Effective Cues

The timing of cues is as important as their content. A cue delivered at the wrong moment, during a music build before an intensity peak, for example, will be heard but not acted upon because the rider’s attention is focused on managing the upcoming effort change.

Effective instructors position technical cues during easier effort segments when riders have the attentional bandwidth to process and apply new information. Motivational cues are reserved for the peaks where attention is consumed by physical demand and technical instruction is less processable.

Delivery volume and clarity matter too. An instructor who cannot project clearly above the studio audio system cannot cue effectively regardless of instruction quality. This is one reason why professional audio installation and instructor microphone quality are not incidental concerns but functional requirements of a quality spin environment.

The Problem With Generic Motivational Cueing

Generic motivational cueing, phrases like “push through,” “you’ve got this,” and “dig deep,” is the default of underprepared spin instruction. It requires no technical knowledge, no understanding of what the body is doing at any given moment in the session, and no ability to adapt to the specific group in the room.

While motivational language has a place in driving effort during maximum intensity segments, a session composed primarily of this type of cueing fails to provide the technical guidance and educational context that separates a coached session from a high-energy background music experience.

Members who have trained under genuinely skilled instructors describe the difference clearly: they leave a well-cued session understanding what they did and why, having corrected technical patterns they were previously unaware of, and feeling that they extracted the maximum physiological value from their time in the studio.

Individual Attention in a Group Setting

One of the marks of a skilled group fitness instructor is the ability to provide individual-specific coaching within a class of 15 or 20 participants. This means observing individual riders during the class, identifying specific technical or intensity management issues, and delivering targeted cues without disrupting the group flow.

This requires an instructor who is genuinely watching the room rather than performing to the front, who can identify the specific rider needing correction from a quick scan, and who can deliver a directed cue naturally within the session’s verbal flow.

FAQ

How can I tell within the first few minutes whether an instructor is highly skilled?

Listen to the specificity of the opening technical instructions during bike setup and warm-up. An instructor who provides precise fit guidance, explains why each adjustment matters, and observes rider position during the warm-up is demonstrating a coaching orientation from the start. An instructor who plays music and delivers primarily motivational language from minute one is revealing their cueing ceiling early.

Should I ask the instructor for personal feedback after class?

Absolutely. Most skilled instructors welcome post-class questions and feedback conversations. Asking what specific adjustments would improve your technique or output is a direct way to access individual coaching beyond what group cueing can deliver.

What should I do if an instructor’s cues are contradicting each other or seem technically incorrect?

It is entirely appropriate to ask for clarification after class. Frame the question as a genuine desire to understand: “I noticed you cued X and then Y, could you help me understand how those two things work together?” A skilled instructor will welcome the question. A defensive response is itself informative about coaching quality.

Is there a way to improve how I apply instructor cues if I am new to spin?

Focus on one or two technical cues per session rather than trying to apply all instruction simultaneously. Identify the cue that addresses your most significant current limitation, apply it deliberately throughout the session, and add additional focus areas as each adjustment becomes automatic.

TFX Singapore develops instructors with a focus on technical cueing quality and individual coaching awareness, ensuring that every class delivers the specific guidance that produces genuine performance improvement rather than simply an energetic group experience.

read more
Featured

How Zumba’s Interval Structure Compares to Conventional LISS Cardio for Fat Utilisation

The debate between steady-state cardiovascular training and interval-based formats for fat utilisation has been one of the more actively discussed topics in exercise science and gym culture simultaneously. What is less commonly examined is where dance-based fitness formats including Zumba classes singapore gyms provide fit within this debate, and whether the specific interval characteristics of a Zumba class produce meaningful fat utilisation advantages over the low-intensity steady-state cardio that remains the default recommendation in many clinical exercise guidelines.

Understanding the Fat Utilisation Question

Fat utilisation during and after exercise is determined by the interaction of exercise intensity, exercise duration, substrate availability, and the hormonal environment created by the training stimulus. The popular belief that low-intensity steady-state exercise is superior for fat burning because it relies more heavily on fat as a fuel during the session is technically accurate but incomplete in its implications.

The During-Session Substrate Perspective

At low to moderate exercise intensities, fat oxidation contributes a higher proportion of the total energy expenditure than at high intensities, where carbohydrate metabolism dominates. A sixty-minute LISS session at fifty percent of maximum heart rate will derive a greater percentage of its fuel from fat oxidation than a sixty-minute interval session that repeatedly elevates intensity to eighty to eighty-five percent of maximum heart rate.

However, the total energy expenditure of these two sessions is not equivalent. The higher-intensity session produces greater total caloric expenditure per unit of time, which means the absolute amount of fat oxidised may be similar or greater despite the lower fat oxidation percentage, because the larger total energy expenditure more than compensates for the lower fat utilisation proportion.

Post-Exercise Oxygen Consumption and Total Fat Oxidation

The full picture of fat utilisation from exercise extends beyond the session itself into the post-exercise period, where elevated oxygen consumption continues to support energy expenditure above resting levels for hours after the training stimulus ends. This post-exercise oxygen consumption elevation is substantially greater following higher-intensity exercise than LISS, producing additional caloric and fat oxidation in the hours after the session that LISS does not replicate at equivalent duration.

Where Zumba’s Interval Structure Fits

Zumba’s choreographic structure naturally produces an interval-like intensity pattern that positions it between pure LISS and formal high-intensity interval training in its fat utilisation characteristics.

The Zumba Intensity Profile

A standard Zumba class alternates between higher-intensity Latin dance sequences with larger movement amplitudes, faster tempos, and more complex choreography that elevates heart rate toward the upper end of the moderate-intensity zone, and lower-intensity recovery sequences with simpler choreography and smaller movement demands that allow partial cardiovascular recovery.

This natural alternation, driven by choreographic design rather than formal interval programming, produces an intensity profile that research has characterised as moderate-to-vigorous intermittent exercise. The repeated cardiovascular elevations and partial recoveries create a metabolic environment that produces meaningful post-exercise oxygen consumption elevation beyond what pure LISS creates, while the recovery sequences prevent the complete glycogen dependence that sustained very high-intensity exercise produces.

Fat Oxidation Over the Full Zumba Session

Research measuring respiratory exchange ratio, the ratio of carbon dioxide produced to oxygen consumed that indicates relative fat and carbohydrate substrate utilisation, during Zumba classes reports values that reflect a blend of fat and carbohydrate substrate use consistent with the moderate-intensity characterisation of the format. This substrate profile means that a Zumba session of sixty minutes produces meaningful absolute fat oxidation both during the session and in the elevated post-exercise period, contributing to a fat utilisation profile that is more comprehensive than equivalent duration LISS.

True Fitness Singapore’s Zumba programme provides instructors trained in intensity management that maximises the cardiovascular and metabolic benefits of the format’s natural interval structure. True Fitness Singapore delivers Zumba classes designed for genuine fitness outcomes alongside the social and enjoyment dimensions that make consistent attendance practically achievable.

FAQs

Q. – My fitness goal is primarily fat loss. Should I choose Zumba or a dedicated HIIT class at my Singapore gym?

Ans. – The format that produces the best fat loss outcomes for your specific situation is the one you attend most consistently over the longest period. If HIIT classes produce higher session-by-session caloric expenditure but you attend twice per week due to the recovery demands and intensity discomfort, while Zumba produces lower per-session expenditure but you attend four times per week due to genuine enjoyment, the Zumba attendance pattern produces greater cumulative weekly energy expenditure. Adherence is the dominant fat loss variable, and the format you actually attend consistently outperforms the theoretically superior format you attend infrequently.

Q. – Is it possible to increase the fat burning intensity of a Zumba class without disrupting other participants?

Ans. – Yes. Individual participants can increase their Zumba session intensity by maximising the range of motion of each movement, adding arm movements to lower body choreography, increasing the size of stepping patterns, and choosing the higher-impact version of choreographic sequences when low-impact options are demonstrated. These individual intensity amplifications increase personal caloric expenditure and cardiovascular demand without affecting other participants’ experience of the class. Discussing intensity amplification strategies with your instructor before class can provide specific guidance on which choreographic elements offer the most effective personal intensity increase options.

Q. – How does Zumba compare to swimming for fat utilisation in Singapore’s heat and humidity context?

Ans. – Swimming and Zumba produce broadly comparable metabolic demands at moderate participation intensity, with swimming having the advantage of full-body muscular engagement and the disadvantage of requiring pool access that most Singapore residential and commercial gym environments do not provide conveniently. The environmental consideration in Singapore is that Zumba in an air-conditioned studio avoids the additional thermoregulatory energy cost of outdoor exercise in heat and humidity, while producing the cardiovascular stimulus in a controlled environment that makes pacing and intensity management more predictable. Both formats are effective for fat utilisation when attended consistently at adequate intensity.

Q. – I have been attending Zumba for three months and no longer feel as physically challenged as I did initially. Has my fitness improved enough that Zumba is no longer effective?

Ans. – The reduced perceived exertion after three months of consistent Zumba attendance reflects genuine cardiovascular adaptation, which is a success indicator rather than a problem. Your aerobic system has become more efficient at meeting the demands of a standard Zumba class, which means you need a progressively greater stimulus to continue developing cardiovascular fitness. Options for progression include attending more intense Zumba sessions with higher-tempo choreography, adding a second cardiovascular format to your weekly training to provide a different stimulus, or increasing Zumba session frequency to maintain cumulative cardiovascular training volume as per-session perceived intensity declines.

Q. – Does Zumba’s fat utilisation benefit extend meaningfully beyond the session itself for Singapore gym members?

Ans. – Yes, through the post-exercise oxygen consumption elevation described in this article, which can persist for two to fourteen hours following a vigorous Zumba session depending on the intensity achieved and the individual’s fitness level. Additionally, regular Zumba participation produces cardiovascular adaptations including improved mitochondrial density in working muscles and enhanced fat oxidation enzyme activity that increase the rate of fat oxidation at all exercise intensities, including daily non-exercise activity. These adaptations develop progressively over months of consistent attendance and represent a genuine metabolic benefit that extends well beyond the sessions themselves.

read more
Dental Care

Wisdom Teeth Removal: What to Expect Before, During, and After

Dealing with wisdom teeth—the third molars that typically emerge in the late teens or early twenties—can often feel like a rite of passage. While some people have perfectly aligned molars that cause no issues, many others face “impaction,” where the teeth lack the space to erupt properly. Understanding the trajectory of this common oral surgery can help turn a potentially stressful event into a manageable recovery.

Why Removal Becomes Necessary

Most dental professionals recommend extraction when there is evidence of crowding, cysts, or decay. Because these teeth are located so far back in the mouth, they are notoriously difficult to clean, making them magnets for bacteria. If left unaddressed, they can cause significant damage to adjacent healthy teeth.

Furthermore, there are various risks associated with delayed wisdom teeth removal that patients should consider. Procrastination can lead to chronic gum infections (pericoronitis), the shifting of previously straightened teeth, and even more complex surgical requirements later in life when the jawbone is denser and healing is slower.

Preparing for the Appointment

Before the day of surgery, your dentist or oral surgeon will conduct a comprehensive evaluation using X-rays or OPG scans. This allows them to map out the root structure and proximity to nerves. During the consultation, you will discuss sedation options:

  • Local Anaesthetic: Numbing only the immediate area.
  • Sedation (Twilight): Administered via IV or gas to keep you relaxed but conscious.
  • General Anaesthetic: Full sleep, usually performed in a hospital setting for complex cases.

You will be advised to fast if undergoing sedation and to arrange for a responsible adult to drive you home. It is also wise to stock your pantry with soft foods like yoghurt, mashed pumpkin, and smoothies beforehand.

The Surgical Procedure

On the day of the procedure, the surgical team will ensure you are comfortable before beginning. Once the anaesthetic has taken effect, the surgeon makes a small incision in the gum tissue to expose the tooth and bone. In many cases, the tooth is divided into smaller sections to make it easier to remove through a smaller opening, which helps preserve the surrounding bone.

After the tooth is extracted, the site is cleaned of any debris. Stitches are often placed to promote healing; these are usually the dissolvable kind that disappear within a week or two. Gauze is placed over the extraction site to control initial bleeding and encourage the formation of a blood clot, which is vital for the healing process.

The First 24 Hours Post-Op

The immediate aftermath is focused on rest and clot preservation. You can expect some swelling and minor bruising, which usually peaks around the second or third day. Using ice packs on the outside of your jaw for 20-minute intervals can significantly reduce inflammation.

It is crucial to avoid “sucking” motions—this means no straws and no smoking—as the pressure can dislodge the blood clot, leading to a painful condition known as dry socket. Stick to a liquid or very soft diet and avoid any strenuous physical activity, as an elevated heart rate can increase bleeding at the surgical site.

Long-Term Recovery and Care

From the second day onwards, you can begin gentle saltwater rinses to keep the area clean. While you should continue brushing your other teeth, be incredibly mindful around the extraction zones. Most patients find they can return to work or school within 2 to 4 days, depending on the complexity of the extraction and their personal pain threshold.

Gradually reintroduce semi-soft foods like scrambled eggs or pasta as your jaw stiffness subsides. If you experience a sudden increase in pain, fever, or a foul taste in your mouth after the third day, contact your clinic immediately, as these can be signs of a secondary infection.

Navigating Potential Challenges

While the vast majority of wisdom teeth extractions are routine and successful, it is important to maintain realistic expectations. No surgery is entirely without peril, and being informed allows you to monitor your recovery more effectively. Like any surgical intervention involving bone and soft tissue, this procedure carries its own risks and complications including temporary nerve numbness or sinus communication.

By following your surgeon’s aftercare instructions to the letter and keeping up with your follow-up appointments, you ensure the best possible outcome for your long-term oral health. Addressing these “extra” teeth early often prevents a lifetime of orthodontic issues and chronic discomfort.

read more
Clinic

How to Dispute a Surprise Bill from an Urgent Care Clinic

You walked into an urgent care clinic with a suspected sprain or a stubborn sinus infection, showed your insurance card, paid your standard copay, and assumed your financial obligation was settled. Four weeks later, an invoice lands in your mailbox demanding hundreds, or even thousands, of dollars.
Surprise medical bills from walk-in facilities have become increasingly common. Between tangled provider networks, outsourced laboratory services, and complex facility classifications, patients often find themselves on the receiving end of aggressive billing for routine care. Receiving an inflated bill is frustrating, but you should not assume the balance is legitimate or final. Billing errors, predatory coding practices, and statutory violations happen regularly.
With a systematic approach, clear documentation, and an understanding of consumer healthcare laws, you can challenge and resolve an unfair urgent care invoice.

Step 1: Halt Payment and Gather Your Documentation

The most critical rule of medical bill disputes is simple: never pay a contested bill immediately. Once you pay, your leverage vanishes, and securing a refund from an urgent care billing office is substantially harder than getting charges adjusted beforehand.
Do not rely on the simple summary invoice sent by the clinic. Most initial bills only list broad categories such as “treatment” or “office visit” alongside a lump sum. Call the billing department immediately and inform them that you are disputing the balance, which temporarily places a hold on your account and prevents it from moving to collections.
Request a complete itemized bill containing:
  • Current Procedural Terminology (CPT) codes for every service rendered
  • Revenue codes detailing department-level charges
  • International Classification of Diseases (ICD-10) diagnostic codes
  • The National Provider Identifier (NPI) of the clinician who treated you
Next, log into your health insurer’s patient portal and pull the Explanation of Benefits (EOB) corresponding to the date of service. An EOB is not a bill; it reflects what the clinic charged your insurer, what your plan agreed to pay under its negotiated contract, what was adjusted off, and what portion constitutes legitimate patient responsibility. If the amount on the clinic’s bill does not match the patient responsibility line on your EOB, the clinic may be attempting to balance-bill you for amounts your insurer already discounted.

Step 2: Identify the Billing Red Flags

Once you have the itemized bill and your EOB side by side, review the specific line items. Surprise urgent care bills typically stem from a few predictable root causes.

The Freestanding Emergency Department Trap

Some facilities market themselves as urgent care centers or neighborhood walk-in clinics while maintaining a legal license as a freestanding emergency room. Emergency departments charge substantial facility fees—charges intended to cover 24/7 operating overhead—that can add thousands to a visit, even for minor issues. If you visited what appeared to be a retail clinic and see a facility charge or an emergency evaluation code (CPT 99281 through 99285), the facility may have obscured its true operational designation.

Upcoded Evaluation and Management (E/M) Levels

Office visits are billed on a tiered scale from Level 1 to Level 5, typically using codes CPT 99202 through 99215 for established or new clinic patients. Higher levels require high medical decision-making complexity or extended face-to-face time. If a provider spent five minutes examining a mild ear infection or minor rash, billing that encounter as a high-complexity Level 4 or Level 5 visit constitutes upcoding. An honest coding review should downgrade the visit to a lower, less expensive tier.

Outsourced Laboratory and Diagnostic Charges

While the urgent care center itself may be in-network with your insurance plan, the external lab analyzing your blood panel, throat culture, or biopsy might not be. Clinics frequently route specimens to out-of-network third-party pathology labs without informing the patient. When this occurs, you receive an unexpected separate bill directly from an unfamiliar diagnostic company.

Unbundled Charges

Medical billing guidelines require certain routine supplies and basic components of care to be bundled into the primary evaluation fee. Some clinics engage in unbundling, billing separately for routine examination supplies such as tongue depressors, gloves, or standard assessment monitoring.

Step 3: Leverage Legal and Regulatory Protections

You are not negotiating solely on goodwill; concrete federal and state statutes protect consumers against unfair healthcare billing practices.
Under the federal No Surprises Act, consumers are shielded from balance billing for emergency services, as well as certain non-emergency services delivered by out-of-network providers at in-network healthcare facilities. If the urgent care clinic you visited operates as an independent freestanding emergency department, or if you were treated at an in-network facility where an out-of-network clinician or lab technician provided services without valid prior written consent, the clinic cannot hold you liable beyond your in-network cost-sharing requirements.
If you are uninsured or chose to pay out of pocket, the No Surprises Act entitles you to a Good Faith Estimate (GFE) before receiving scheduled care. If the final bill exceeds the GFE by at least $400, you have the legal right to dispute the charges through the federal Patient-Provider Dispute Resolution process within 120 days of the bill date.
Many states have passed consumer protections that extend even further than federal statutes, placing strict caps on facility fees at ambulatory clinics or banning balance billing outright across all urgent care settings. Research your state’s Department of Insurance regulations to see if local mandates apply to your situation.
Furthermore, major credit reporting agencies no longer include paid medical collection debt on consumer credit files, and all medical debts under $500 are excluded from credit reports entirely. Additionally, there is a mandatory one-year waiting period before unpaid medical debt can appear on your credit profile. This gives you ample time to conduct a formal dispute without immediate peril to your credit score.

Step 4: Execute a Strategic Negotiation Call

Armed with your itemized bill, your EOB, and relevant statutory terms, call the clinic’s billing department directly. Maintain a polite, professional, and methodical tone throughout the exchange.
Before diving into details, obtain the representative’s full name, direct phone extension, and a tracking or interaction reference number for the call.
Structure your conversation around specific points:
  • Request a formal coding audit. If you suspect upcoding, state: “Based on the brief duration and minimal clinical complexity of this visit, billing a Level 4 evaluation appears inaccurate. I am formally requesting a medical records review and coding audit to ensure the documentation justifies this level of billing.”
  • Challenge surprise out-of-network labs. If an outside lab processed your swabs out-of-network, point out that you selected an in-network facility and were never provided notification or consent to utilize an out-of-network laboratory partner. Ask the clinic to reprocess the charge under the in-network contractual allowance.
  • Negotiate toward the fair market rate. If you are self-pay or if insurance denied the claim, look up the Medicare allowable rate or fair market cash value for the specific CPT codes listed on your bill. Offer to settle the account immediately for that baseline cash rate, pointing out that your cash offer provides immediate, guaranteed funds without the administrative burden of collections.
Take contemporaneous notes during the call, recording the date, time, and precise commitments made by the representative.

Step 5: Escalate with a Formal Written Dispute

If verbal discussions fail to correct the bill, escalate the matter into writing. A formal written dispute creates an official paper trail and signals to the provider that you understand your consumer rights.
Draft a concise letter stating your account number, patient details, and date of service. Clearly detail why the bill is disputed, referencing specific CPT codes, discrepancies between the bill and your EOB, or violations of federal balance billing rules. Include photocopies of your itemized bill, EOB, and payment receipts for any copays previously paid.
Send the letter via Certified Mail with Return Receipt Requested. This ensures you possess proof of delivery, which prevents the billing agency from claiming the dispute was never filed. State explicitly in your letter that the bill is formally disputed under federal and state consumer protections, and demand that the account remain in dispute status and paused from debt collection activity pending resolution.
Simultaneously, contact your health insurance provider’s member services line to file a grievance or request a claim re-adjudication if you believe the clinic misapplied network discounts or submitted inappropriate billing codes.

Step 6: File an External Regulatory Complaint

When internal appeals stall, external regulatory intervention often prompts a swift administrative resolution. Clinics and billing agencies face severe audits and financial penalties for noncompliance with consumer billing mandates.
If the facility insists on collecting charges that violate the No Surprises Act, submit a complaint directly through the federal Centers for Medicare & Medicaid Services (CMS) No Surprises Help Desk.
If the dispute involves deceptive business practices, hidden facility designations, or refusal to honor state insurance protections, file an administrative complaint with your State Insurance Commissioner and your state’s Attorney General Consumer Protection Division. Most healthcare providers maintain dedicated compliance officers who review and resolve state agency inquiries promptly, often dismissing or significantly settling the balance to close the investigation.
read more
Dental Care

The New Signature Look: Why Dental Veneers are the Modern Wardrobe Staple

A confident smile is no longer just a desirable trait—it’s a cornerstone of personal style. In an era where visuals dominate first impressions, people are increasingly turning to cosmetic dentistry not only to fix dental issues but also to enhance overall appearance. Among the most popular and impactful options are dental veneers, a versatile solution that can transform teeth into a harmonious, radiant smile. What was once limited to celebrities has now become a mainstream beauty and confidence booster, helping everyday people present their best selves to the world.

What Dental Veneers Are and Why They Matter

Dental veneers are ultra-thin, custom-made shells that bond to the front of your natural teeth. They can address a range of concerns, including discoloration, chips, mild misalignment, uneven spacing, and irregular shapes. Unlike braces or whitening treatments that target specific problems over time, veneers provide immediate and comprehensive smile enhancement. Their rise in popularity stems from their ability to deliver dramatic improvements while preserving a natural look.

More than just cosmetic accessories, veneers play a key role in enhancing the symmetry and balance of the face. A balanced smile can influence how all other features—like your eyes and lips—are perceived, ultimately boosting overall facial harmony.

Restoring Balance and Symmetry with Dental Veneers

One of the most compelling benefits of cosmetic veneers is restoring balance and symmetry with dental veneers that fit seamlessly into your unique facial structure. Symmetry is a subtle yet powerful factor in how beauty is perceived; it’s associated with health, vitality, and attractiveness. When teeth vary in size or shape, or when minor gaps and irregularities disrupt the visual flow of a smile, the overall impact can be diminished.

Custom veneers correct these inconsistencies by creating even, well-proportioned teeth that support a balanced smile. Using high-quality materials and expert craftsmanship, dental professionals can tailor each veneer to suit the contours of your face and your personal aesthetic goals. The result is a cohesive dental appearance that enhances both your smile and your overall look.

Porcelain veneers, in particular, are known for their strength and resemblance to natural teeth. With proper care, they can resist stains and maintain their brightness for many years. For those seeking a long-term enhancement with durable results, options like long-lasting porcelain veneers offer an effective blend of beauty and resilience that keeps smiles looking fresh and vibrant.

The Psychological Upside of a Strong Smile

The impact of an improved smile goes beyond the physical. Confidence plays a central role in social and professional interactions, and the way you feel about your smile directly affects how you engage with others. People who are happy with their smiles tend to smile more often—a simple act that can make you appear more approachable, friendly, and confident.

Scientific research also supports the psychological benefits of smiling. Smiling releases endorphins, which can elevate mood and reduce stress. A pleasing smile doesn’t just boost your appearance—it contributes to emotional well-being. Veneers, by correcting imperfections that may have caused self-consciousness, allow individuals to express themselves more freely and confidently.

Customization: Tailoring Your Smile

One of the strengths of modern veneers is their customizability. Dental professionals take into account factors such as facial shape, lip line, skin tone, and even personality when designing veneers. This ensures that the final result feels natural and in harmony with your overall appearance.

The process typically begins with a detailed consultation. Your dental provider will evaluate your oral health and discuss your smile goals. Impressions or digital scans are taken to help create veneers that match both function and aesthetics. Once fabricated, the veneers are carefully bonded to your teeth for a seamless fit.

Because veneers are tailored to each individual, the outcome is not a generic “perfect” smile, but one that enhances your natural features. This personalized approach distinguishes veneers from other cosmetic treatments that may lack nuance or subtlety.

Long-Term Care and Maintenance

Maintaining veneers is straightforward. Regular brushing, flossing, and routine dental check-ups are essential to keep both natural teeth and veneers in excellent condition. While veneers are durable, you should avoid habits that place undue stress on them—like biting down on hard objects or using your teeth as tools.

Porcelain veneers are especially noted for their long-term performance. With vigilant oral hygiene and routine dental care, they can last for over a decade, preserving the initial investment in your smile.

Who Is a Good Candidate?

Not everyone is an ideal candidate for veneers. Individuals with significant tooth decay, gum disease, or severe bite issues may require treatment for those conditions before veneers are considered. A comprehensive evaluation by a qualified dentist will determine whether veneers are the right choice based on your dental health and aesthetic goals.

Once any underlying concerns are addressed, veneers can be a powerful tool for smile enhancement. They are suitable for adults who are in good overall oral health and want a long-lasting, natural-looking improvement.

The Role of Technology in Modern Veneer Dentistry

Advancements in dental technology have greatly improved the precision, comfort, and outcome of veneer treatments. Digital imaging, 3D modeling, and innovative materials allow dentists to plan and execute smile transformations with remarkable accuracy, ensuring results that align with patient expectations. From initial assessment to final placement, these innovations make the entire journey more predictable and satisfying. Understanding how modern technology plays in ensuring those smile goals are met helps demystify the process and highlights why veneers have become such a trusted option in cosmetic dentistry.

By enhancing structural symmetry, boosting confidence, and integrating seamlessly with natural features, dental veneers have become a modern staple in personal style and self-expression—transforming smiles and lives in the process.

read more
Dental Care

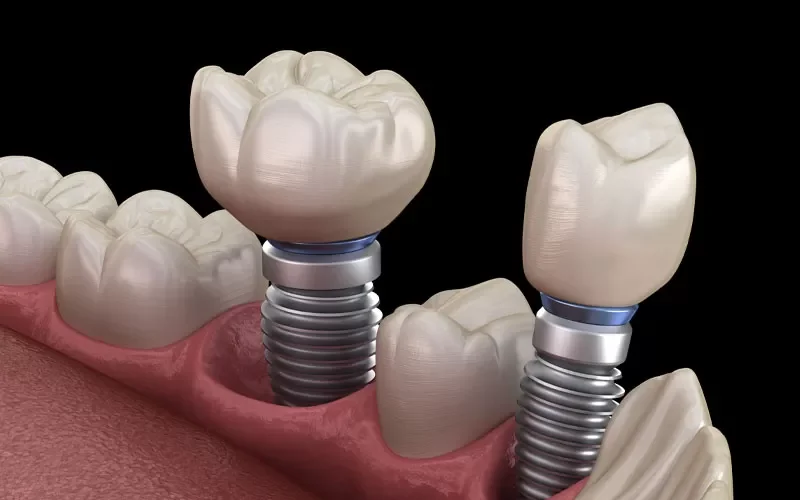
Titanium in Dentistry: Why Grade 5 Alloys Set the Standard for Implants

Dental implantology is one of the most transformative fields in modern healthcare, restoring not just smiles but also quality of life for millions of patients worldwide. At the center of every successful implant case is material science. The choice of implant material determines whether osseointegration occurs predictably, whether the fixture withstands years of functional loading, and whether clinicians can confidently assure their patients of long-term success.

Among the many materials investigated, titanium alloys, particularly Grade 5 (Ti-6Al-4V ELI), have emerged as the gold standard. This alloy has shaped implant dentistry, allowing manufacturers to design systems that balance strength, biocompatibility, and innovation.

Why Titanium Is Essential in Dentistry

Titanium has been used in medical devices since the mid-20th century. Its appeal lies in a rare combination of properties:

  • Biocompatibility: Titanium forms a stable oxide layer when exposed to oxygen, making it resistant to corrosion and well-accepted by the body.
  • Osseointegration: Discovered by Per-Ingvar Brånemark in the 1950s, titanium’s unique ability to bond directly with bone remains the foundation of modern implantology.
  • Durability: Unlike stainless steel or cobalt-chrome, titanium can withstand the complex biomechanical forces of the oral environment without breaking down.

These qualities explain why titanium continues to dominate implant manufacturing, even as new biomaterials are explored.

CP Titanium vs. Titanium Grade 5

The first dental implants were made from commercially pure (CP) titanium, which remains biocompatible but has limitations in strength. While CP titanium (Grades 1–4) is softer and more ductile, its lower fatigue resistance can make it less suitable for high-load regions, especially in smaller diameter implants. Modern solutions, such as dental implants from GDT Implants, offer improved strength and durability to address these challenges.

Grade 5 titanium alloy (Ti-6Al-4V ELI) changes the equation. By incorporating about 6% aluminum and 4% vanadium, the alloy achieves significantly higher tensile strength and fatigue resistance while maintaining excellent biocompatibility.

Clinical advantages of Grade 5 include:

  • Higher fracture resistance: Reduces the risk of implant failure under heavy occlusal forces.
  • Slimmer implant designs: Enables the use of smaller diameter implants in narrow ridges without compromising strength.
  • Extended longevity: Withstands decades of cyclic loading, especially in posterior regions where stress is highest.

A 2018 study in the Journal of Prosthetic Dentistry confirmed that Grade 5 implants outperform CP titanium under cyclic loading, a condition that closely simulates real-world chewing forces.

How Surface Treatments Enhance Titanium Alloys

Material choice is only half the story. To optimize osseointegration, manufacturers apply surface treatments that alter the micro- and nano-topography of the titanium alloy.

  • SLA (Sandblasted, Large-grit, Acid-etched): Creates a microroughened surface that increases bone-to-implant contact. SLA surfaces are among the most researched, with decades of clinical data supporting their effectiveness.
  • RBM (Resorbable Blast Media): Uses biocompatible blasting particles such as calcium phosphate that dissolve, leaving a clean, moderately rough surface. RBM is particularly valued for soft tissue compatibility and reduced contamination risk.

When combined with the mechanical advantages of Grade 5 titanium, these treatments accelerate early healing and provide the stability needed for advanced protocols, including immediate and early loading.

Clinical Applications of Grade 5 Titanium Implants

The strength and versatility of Grade 5 titanium make it suitable across a wide range of clinical scenarios:

  • Anterior esthetic cases: Allows for smaller diameter implants that minimize invasiveness while preserving strength.
  • Posterior restorations: Withstands high occlusal forces, reducing fracture risk in molar regions.
  • Full-arch restorations: Supports immediate loading protocols when paired with SLA-treated surfaces.
  • Compromised bone sites: Tapered designs in Grade 5 titanium offer stability even in softer bone densities.

A systematic review published in Clinical Oral Implants Research reported success rates exceeding 95% at 10 years when titanium implants were combined with modern surface treatments and proper surgical protocols.

Why Grade 5 Remains the Gold Standard

Although ceramic implants and hybrid materials are gaining attention, long-term data still overwhelmingly support titanium, particularly Grade 5, as the most reliable implant material available today.

Key reasons include:

  • Extensive clinical validation spanning decades
  • Ability to support innovative designs like platform switching and conical connections
  • Compatibility with regenerative procedures such as GBR and PRF protocols
  • Proven long-term survival rates in diverse patient populations

This balance of strength, adaptability, and biocompatibility explains why titanium Grade 5 remains the default choice for implant manufacturers and clinicians alike.

Looking Ahead: Innovation Rooted in Titanium

Future research may refine surface treatments further, exploring nanostructures and biomimetic coatings that mimic natural bone. Digital workflows will also continue to integrate seamlessly with titanium implant systems, from guided surgery to CAD/CAM prosthetics. Yet at the core, titanium alloys, especially Grade 5, provide the foundation for innovation.

Clinicians seeking predictable results often select titanium-based systems like the, which combine Grade 5 alloy strength with advanced SLA and RBM surface treatment options. These systems are engineered to deliver reliable osseointegration and long-term success, case after case.

Choosing Dental Implants in Panama allows patients to receive durable, natural-looking restorations without excessive costs. Specialists use high-quality materials and precise placement techniques to ensure stability and comfort. With proper planning and expert consultation, individuals achieve improved oral health, better function, and renewed confidence in their smile.

Final Takeaway

In implant dentistry, material matters. CP titanium opened the door to osseointegration, but titanium Grade 5 established the standard of care. Its superior mechanical strength, compatibility with advanced surface treatments, and proven clinical performance make it indispensable in modern practice.

For clinicians and patients alike, choosing Grade 5 titanium implants means choosing a solution engineered for stability, durability, and long-term success.

read more
1 2 3 4 … 21
Page 2 of 21