close

April 2026

Dental Care

How to Keep Your Teeth From Staining Around Your Braces Brackets

The day your braces come off is supposed to be a celebration. You picture running your tongue over smooth, perfectly straight teeth and seeing a bright, uniform smile in the mirror. For too many orthodontic patients, however, that reveal comes with an unwelcome shock: pale, chalky frames or dull yellow outlines marking the exact spot where each bracket sat for the past two years.
These marks, often called bracket halos, are among the most common complications of orthodontic treatment. The hardware that straightens your teeth also creates hundreds of tiny ledges, corners, and crevices where plaque loves to hide. Preventing those discolored borders does not mean you have to maintain an impossible standard of perfection. It simply requires understanding how enamel breaks down around brackets and building a daily routine that actively defends those vulnerable margins.

White Spot Lesions vs. Surface Stains: Knowing the Real Culprit

When people talk about braces stains, they usually lump two very different problems into the same category. Understanding which one you are fighting determines how you protect your teeth.
Surface stains are extrinsic. They come from dark pigments in coffee, black tea, marinara sauce, red wine, and berries soaking into the sticky film of plaque that settles along the edges of your brackets. While surface stains look unattractive, a dental hygienist can usually polish them away with professional equipment once your hardware is removed.
The far more serious threat is decalcification, which creates permanent white spot lesions. These chalky, opaque patches are not surface discolorations. They represent the earliest stage of tooth decay. When plaque sits undisturbed around bracket borders, the bacteria inside it consume leftover sugars and produce continuous bursts of lactic acid. That acid leaches vital minerals like calcium and phosphate straight out of the enamel. Once the mineral lattice beneath the surface becomes porous, light reflects through it differently, leaving behind an indelible white scar. If left unchecked, these lesions eventually collapse into full cavities.

The Whitening Mistake That Makes Discoloration Worse

When patients notice slight yellowing or shadowing around their braces, their first impulse is often to reach for whitening strips, bleaching pens, or abrasive charcoal toothpastes. This is one of the worst mistakes you can make during active orthodontic treatment.
Whitening products only penetrate the exposed tooth structure. The square of enamel resting beneath the composite bonding resin holding your bracket is completely shielded from the bleaching agent. If you whiten your teeth while wearing braces, you create a two-tone checkerboard effect. The exposed surfaces will lighten, but when the orthodontist removes the brackets, the enamel underneath will remain its original, darker shade.
Furthermore, many commercial whitening toothpastes rely on coarse abrasives to scrub away surface film. On braced teeth, these abrasive particles scratch the edges of resin cement, wear down clear ceramic brackets, and create microscopic grooves in the enamel where new plaque can anchor even more aggressively. Put the whitening products in a drawer until your treatment is completely finished.

The Two-Angle Brushing Technique

A standard back-and-forth brushing motion is almost useless against orthodontic hardware. Flat bristles simply glide across the top faces of the brackets, completely missing the narrow corridors between the brackets and the gumline. To clean the margins where demineralization actually happens, you must alter your approach.
Hold your soft-bristled or electric toothbrush at a 45-degree angle pointing downward toward the top of the bracket, right along the gumline. Use small, circular vibrations to work the bristle tips under the archwire and against the upper edge of the bracket base. Once you have cleared the top perimeter of every tooth, switch the brush to a 45-degree angle pointing upward from the biting edge. This angle forces the bristles beneath the lower margin of the bracket, where food debris tends to drop and collect after meals.
Dedicate at least two full minutes to this process morning and night. If you use a manual toothbrush, consider switching to an oscillating electric model designed with an orthodontic brush head. The high-speed rotation generates fluid dynamics that help flush out sticky biofilm from spaces that standard nylon bristles cannot physically reach.

Essential Tools Beyond the Standard Toothbrush

Even the best brushing technique cannot clear every pocket of plaque around brackets and wires. If you want to keep your enamel pristine, your daily kit needs a few supplementary tools.

The Interdental Proxabrush

An interdental brush looks like a miniature pipe cleaner on a thin plastic handle, and it is the single most effective tool for preventing bracket halos. Slide the proxabrush vertically beneath the archwire between each bracket, brushing up and down against the sides of the metal. Doing this sweeps away the stubborn, glue-like plaque that sits directly against the adhesive perimeter, an area normal brush heads consistently bridge right over.

Hydrostatic Flushing vs. Traditional String

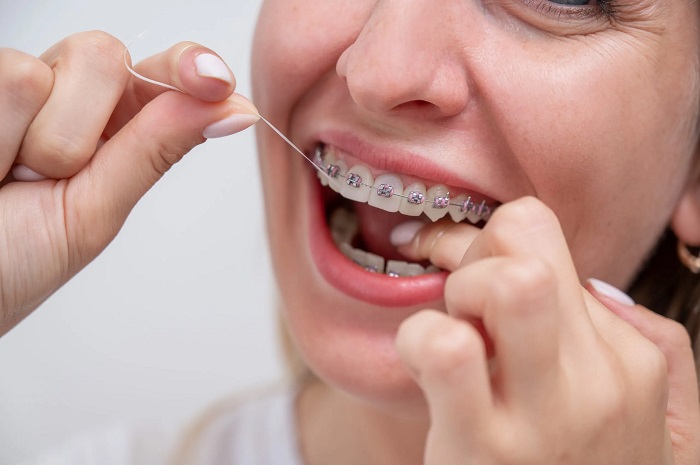
Many patients abandon flossing entirely once braces are placed because threading string around thirty brackets feels exhausting. While a water flosser is a fantastic addition to your routine, it is not a complete replacement for manual flossing. A water flosser uses pressurized pulses to dislodge large food chunks and dilute bacterial colonies around the gingival margin, but it cannot exert the mechanical friction required to wipe away sticky biofilm. Combine both methods: use a water flosser after meals for quick cleanup, and use a dedicated orthodontic floss threader or stiff-ended floss pick once every night before bed.

Remineralizing Your Enamel From the Outside In

Because plaque acid constantly pulls minerals out of your enamel, your daily hygiene routine must actively put those minerals back. You cannot reverse a full cavity, but you can remineralize early microscopic demineralization before it turns into an irreversible white scar.
Incorporate an alcohol-free sodium fluoride mouthwash into your daily regimen, preferably right before bed. Rinse thoroughly for one full minute after brushing, and spit the excess out without immediately following it with water. Leaving a light residual film of fluoride on your teeth allows the mineral ions to integrate directly into the crystalline enamel structure overnight, forming a acid-resistant shield known as fluorapatite.
For patients at high risk of staining or decalcification, talk to your dentist or orthodontist about prescription-strength pastes containing 5,000 parts per million fluoride, or remineralizing agents featuring nano-hydroxyapatite. Nano-hydroxyapatite particles are biochemically identical to natural tooth structure, allowing them to physically slot into microscopic enamel fissures and restore surface density around vulnerable bracket borders.

How Dietary Timing Protects Bracket Margins

Most orthodontic dietary advice focuses on avoiding hard, crunchy foods that snap brackets off the teeth. However, preventing stains is much more about the frequency of your eating habits than avoiding hard crusts.
Every time you consume fermentable carbohydrates or acidic drinks, the pH in your mouth plummets below 5.5, triggering active demineralization. It takes your saliva roughly twenty to thirty minutes of natural buffering to restore a neutral pH. If you sip an iced caramel macchiato, a sports drink, or a flavored sparkling water at your desk across four hours, your teeth spend that entire morning submerged in a destructive acid bath.
Consolidate your treats into short meal windows rather than grazing throughout the day. When you finish an acidic drink or snack, immediately rinse your mouth with plain tap water to wash away lingering sugars and neutralize the environment. Crucially, wait at least thirty minutes before brushing after consuming something acidic. Acid temporarily softens the outer micro-layer of enamel; scrubbing that softened surface immediately with a toothbrush will strip away enamel faster than plaque ever could.

Catching Changes Before Debonding Day

Keep a close eye on your bracket perimeters in a well-lit mirror once a week. If you notice chalky matte borders, persistent bleeding along the gums, or dull discoloration creeping around the edges of your hardware, bring it up at your next adjustment visit. Your orthodontist can apply an in-office fluoride varnish to halt the progression of early lesions before they deepen.
Never skip your regular cleanings with your general family dentist while wearing braces. Orthodontists focus on the mechanics of bone remodeling and tooth alignment; your dental hygienist remains your front-line defender for scaling away stubborn tartar, assessing gum health, and ensuring that the straight smile you reveal on debonding day is clean, healthy, and uniformly bright

read more
Fitness

The Role of Instructor Cueing in Maximising Spin Class Outcomes

A spin class without skilled instructor cueing is simply a room full of people on stationary bikes with music playing. The instructor’s voice is the primary tool through which a group training session is transformed from an individual effort into a coached, structured experience that produces specific physiological adaptations. Yet the quality of cueing varies enormously across Singapore’s fitness landscape, and members who understand what good cueing sounds like are far better positioned to evaluate and benefit from the studios they choose.

The best spin studio Singapore experiences are distinguished as much by the quality of verbal instruction as by the quality of the equipment. These two variables are inseparable in determining what a member actually gets from a session.

What Cueing Actually Is

Cueing in a fitness context refers to verbal or visual instructions that guide movement, effort, or focus during a training session. In spin specifically, cueing operates across several dimensions simultaneously:

  • Technical cues that guide rider position, pedalling mechanics, and resistance management
  • Intensity cues that communicate the target effort level for each session segment
  • Motivational cues that maintain engagement and push effort during demanding segments
  • Safety cues that correct dangerous patterns or prevent injury in real time
  • Educational cues that explain the physiological purpose of what is being done

Excellent instructors deploy all five types of cueing purposefully throughout a session. Weaker instructors rely primarily on motivational cueing, which is the easiest to deliver but the least specifically useful for producing training outcomes.

Technical Cueing and Its Effect on Performance

Technical cues are the most directly performance-relevant type of instruction in a spin class. They address the mechanics of how force is applied to the pedals, how the rider’s body position is managed, and how resistance and cadence interact.

Common technical cues that improve performance include:

  • Pedalling in circles rather than pushing down: directing attention to the complete 360-degree pedal stroke rather than just the downstroke improves power application efficiency
  • Relaxing the upper body and grip: tension in the hands, arms, and shoulders wastes energy that should be directed to the legs
  • Hip position over the saddle: anterior pelvic tilt during climbing segments recruits the gluteal musculature more effectively, improving power output and reducing knee strain
  • Heel position through the pedal stroke: maintaining a flat or slightly heel-down foot position through the bottom of the stroke protects the Achilles tendon and improves force transmission

These cues are specific, actionable, and immediately applicable. A member who receives and applies them correctly during a session gets meaningfully more from the same physical effort than one who rides without this guidance.

The Timing and Delivery of Effective Cues

The timing of cues is as important as their content. A cue delivered at the wrong moment, during a music build before an intensity peak, for example, will be heard but not acted upon because the rider’s attention is focused on managing the upcoming effort change.

Effective instructors position technical cues during easier effort segments when riders have the attentional bandwidth to process and apply new information. Motivational cues are reserved for the peaks where attention is consumed by physical demand and technical instruction is less processable.

Delivery volume and clarity matter too. An instructor who cannot project clearly above the studio audio system cannot cue effectively regardless of instruction quality. This is one reason why professional audio installation and instructor microphone quality are not incidental concerns but functional requirements of a quality spin environment.

The Problem With Generic Motivational Cueing

Generic motivational cueing, phrases like “push through,” “you’ve got this,” and “dig deep,” is the default of underprepared spin instruction. It requires no technical knowledge, no understanding of what the body is doing at any given moment in the session, and no ability to adapt to the specific group in the room.

While motivational language has a place in driving effort during maximum intensity segments, a session composed primarily of this type of cueing fails to provide the technical guidance and educational context that separates a coached session from a high-energy background music experience.

Members who have trained under genuinely skilled instructors describe the difference clearly: they leave a well-cued session understanding what they did and why, having corrected technical patterns they were previously unaware of, and feeling that they extracted the maximum physiological value from their time in the studio.

Individual Attention in a Group Setting

One of the marks of a skilled group fitness instructor is the ability to provide individual-specific coaching within a class of 15 or 20 participants. This means observing individual riders during the class, identifying specific technical or intensity management issues, and delivering targeted cues without disrupting the group flow.

This requires an instructor who is genuinely watching the room rather than performing to the front, who can identify the specific rider needing correction from a quick scan, and who can deliver a directed cue naturally within the session’s verbal flow.

FAQ

How can I tell within the first few minutes whether an instructor is highly skilled?

Listen to the specificity of the opening technical instructions during bike setup and warm-up. An instructor who provides precise fit guidance, explains why each adjustment matters, and observes rider position during the warm-up is demonstrating a coaching orientation from the start. An instructor who plays music and delivers primarily motivational language from minute one is revealing their cueing ceiling early.

Should I ask the instructor for personal feedback after class?

Absolutely. Most skilled instructors welcome post-class questions and feedback conversations. Asking what specific adjustments would improve your technique or output is a direct way to access individual coaching beyond what group cueing can deliver.

What should I do if an instructor’s cues are contradicting each other or seem technically incorrect?

It is entirely appropriate to ask for clarification after class. Frame the question as a genuine desire to understand: “I noticed you cued X and then Y, could you help me understand how those two things work together?” A skilled instructor will welcome the question. A defensive response is itself informative about coaching quality.

Is there a way to improve how I apply instructor cues if I am new to spin?

Focus on one or two technical cues per session rather than trying to apply all instruction simultaneously. Identify the cue that addresses your most significant current limitation, apply it deliberately throughout the session, and add additional focus areas as each adjustment becomes automatic.

TFX Singapore develops instructors with a focus on technical cueing quality and individual coaching awareness, ensuring that every class delivers the specific guidance that produces genuine performance improvement rather than simply an energetic group experience.

read more
Featured

How Zumba’s Interval Structure Compares to Conventional LISS Cardio for Fat Utilisation

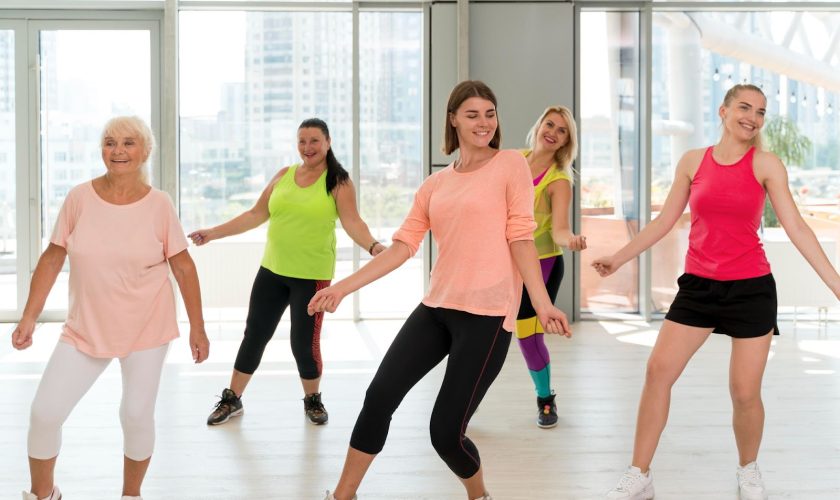
The debate between steady-state cardiovascular training and interval-based formats for fat utilisation has been one of the more actively discussed topics in exercise science and gym culture simultaneously. What is less commonly examined is where dance-based fitness formats including Zumba classes singapore gyms provide fit within this debate, and whether the specific interval characteristics of a Zumba class produce meaningful fat utilisation advantages over the low-intensity steady-state cardio that remains the default recommendation in many clinical exercise guidelines.

Understanding the Fat Utilisation Question

Fat utilisation during and after exercise is determined by the interaction of exercise intensity, exercise duration, substrate availability, and the hormonal environment created by the training stimulus. The popular belief that low-intensity steady-state exercise is superior for fat burning because it relies more heavily on fat as a fuel during the session is technically accurate but incomplete in its implications.

The During-Session Substrate Perspective

At low to moderate exercise intensities, fat oxidation contributes a higher proportion of the total energy expenditure than at high intensities, where carbohydrate metabolism dominates. A sixty-minute LISS session at fifty percent of maximum heart rate will derive a greater percentage of its fuel from fat oxidation than a sixty-minute interval session that repeatedly elevates intensity to eighty to eighty-five percent of maximum heart rate.

However, the total energy expenditure of these two sessions is not equivalent. The higher-intensity session produces greater total caloric expenditure per unit of time, which means the absolute amount of fat oxidised may be similar or greater despite the lower fat oxidation percentage, because the larger total energy expenditure more than compensates for the lower fat utilisation proportion.

Post-Exercise Oxygen Consumption and Total Fat Oxidation

The full picture of fat utilisation from exercise extends beyond the session itself into the post-exercise period, where elevated oxygen consumption continues to support energy expenditure above resting levels for hours after the training stimulus ends. This post-exercise oxygen consumption elevation is substantially greater following higher-intensity exercise than LISS, producing additional caloric and fat oxidation in the hours after the session that LISS does not replicate at equivalent duration.

Where Zumba’s Interval Structure Fits

Zumba’s choreographic structure naturally produces an interval-like intensity pattern that positions it between pure LISS and formal high-intensity interval training in its fat utilisation characteristics.

The Zumba Intensity Profile

A standard Zumba class alternates between higher-intensity Latin dance sequences with larger movement amplitudes, faster tempos, and more complex choreography that elevates heart rate toward the upper end of the moderate-intensity zone, and lower-intensity recovery sequences with simpler choreography and smaller movement demands that allow partial cardiovascular recovery.

This natural alternation, driven by choreographic design rather than formal interval programming, produces an intensity profile that research has characterised as moderate-to-vigorous intermittent exercise. The repeated cardiovascular elevations and partial recoveries create a metabolic environment that produces meaningful post-exercise oxygen consumption elevation beyond what pure LISS creates, while the recovery sequences prevent the complete glycogen dependence that sustained very high-intensity exercise produces.

Fat Oxidation Over the Full Zumba Session

Research measuring respiratory exchange ratio, the ratio of carbon dioxide produced to oxygen consumed that indicates relative fat and carbohydrate substrate utilisation, during Zumba classes reports values that reflect a blend of fat and carbohydrate substrate use consistent with the moderate-intensity characterisation of the format. This substrate profile means that a Zumba session of sixty minutes produces meaningful absolute fat oxidation both during the session and in the elevated post-exercise period, contributing to a fat utilisation profile that is more comprehensive than equivalent duration LISS.

True Fitness Singapore’s Zumba programme provides instructors trained in intensity management that maximises the cardiovascular and metabolic benefits of the format’s natural interval structure. True Fitness Singapore delivers Zumba classes designed for genuine fitness outcomes alongside the social and enjoyment dimensions that make consistent attendance practically achievable.

FAQs

Q. – My fitness goal is primarily fat loss. Should I choose Zumba or a dedicated HIIT class at my Singapore gym?

Ans. – The format that produces the best fat loss outcomes for your specific situation is the one you attend most consistently over the longest period. If HIIT classes produce higher session-by-session caloric expenditure but you attend twice per week due to the recovery demands and intensity discomfort, while Zumba produces lower per-session expenditure but you attend four times per week due to genuine enjoyment, the Zumba attendance pattern produces greater cumulative weekly energy expenditure. Adherence is the dominant fat loss variable, and the format you actually attend consistently outperforms the theoretically superior format you attend infrequently.

Q. – Is it possible to increase the fat burning intensity of a Zumba class without disrupting other participants?

Ans. – Yes. Individual participants can increase their Zumba session intensity by maximising the range of motion of each movement, adding arm movements to lower body choreography, increasing the size of stepping patterns, and choosing the higher-impact version of choreographic sequences when low-impact options are demonstrated. These individual intensity amplifications increase personal caloric expenditure and cardiovascular demand without affecting other participants’ experience of the class. Discussing intensity amplification strategies with your instructor before class can provide specific guidance on which choreographic elements offer the most effective personal intensity increase options.

Q. – How does Zumba compare to swimming for fat utilisation in Singapore’s heat and humidity context?

Ans. – Swimming and Zumba produce broadly comparable metabolic demands at moderate participation intensity, with swimming having the advantage of full-body muscular engagement and the disadvantage of requiring pool access that most Singapore residential and commercial gym environments do not provide conveniently. The environmental consideration in Singapore is that Zumba in an air-conditioned studio avoids the additional thermoregulatory energy cost of outdoor exercise in heat and humidity, while producing the cardiovascular stimulus in a controlled environment that makes pacing and intensity management more predictable. Both formats are effective for fat utilisation when attended consistently at adequate intensity.

Q. – I have been attending Zumba for three months and no longer feel as physically challenged as I did initially. Has my fitness improved enough that Zumba is no longer effective?

Ans. – The reduced perceived exertion after three months of consistent Zumba attendance reflects genuine cardiovascular adaptation, which is a success indicator rather than a problem. Your aerobic system has become more efficient at meeting the demands of a standard Zumba class, which means you need a progressively greater stimulus to continue developing cardiovascular fitness. Options for progression include attending more intense Zumba sessions with higher-tempo choreography, adding a second cardiovascular format to your weekly training to provide a different stimulus, or increasing Zumba session frequency to maintain cumulative cardiovascular training volume as per-session perceived intensity declines.

Q. – Does Zumba’s fat utilisation benefit extend meaningfully beyond the session itself for Singapore gym members?

Ans. – Yes, through the post-exercise oxygen consumption elevation described in this article, which can persist for two to fourteen hours following a vigorous Zumba session depending on the intensity achieved and the individual’s fitness level. Additionally, regular Zumba participation produces cardiovascular adaptations including improved mitochondrial density in working muscles and enhanced fat oxidation enzyme activity that increase the rate of fat oxidation at all exercise intensities, including daily non-exercise activity. These adaptations develop progressively over months of consistent attendance and represent a genuine metabolic benefit that extends well beyond the sessions themselves.

read more
Dental Care

Wisdom Teeth Removal: What to Expect Before, During, and After

Dealing with wisdom teeth—the third molars that typically emerge in the late teens or early twenties—can often feel like a rite of passage. While some people have perfectly aligned molars that cause no issues, many others face “impaction,” where the teeth lack the space to erupt properly. Understanding the trajectory of this common oral surgery can help turn a potentially stressful event into a manageable recovery.

Why Removal Becomes Necessary

Most dental professionals recommend extraction when there is evidence of crowding, cysts, or decay. Because these teeth are located so far back in the mouth, they are notoriously difficult to clean, making them magnets for bacteria. If left unaddressed, they can cause significant damage to adjacent healthy teeth.

Furthermore, there are various risks associated with delayed wisdom teeth removal that patients should consider. Procrastination can lead to chronic gum infections (pericoronitis), the shifting of previously straightened teeth, and even more complex surgical requirements later in life when the jawbone is denser and healing is slower.

Preparing for the Appointment

Before the day of surgery, your dentist or oral surgeon will conduct a comprehensive evaluation using X-rays or OPG scans. This allows them to map out the root structure and proximity to nerves. During the consultation, you will discuss sedation options:

  • Local Anaesthetic: Numbing only the immediate area.
  • Sedation (Twilight): Administered via IV or gas to keep you relaxed but conscious.
  • General Anaesthetic: Full sleep, usually performed in a hospital setting for complex cases.

You will be advised to fast if undergoing sedation and to arrange for a responsible adult to drive you home. It is also wise to stock your pantry with soft foods like yoghurt, mashed pumpkin, and smoothies beforehand.

The Surgical Procedure

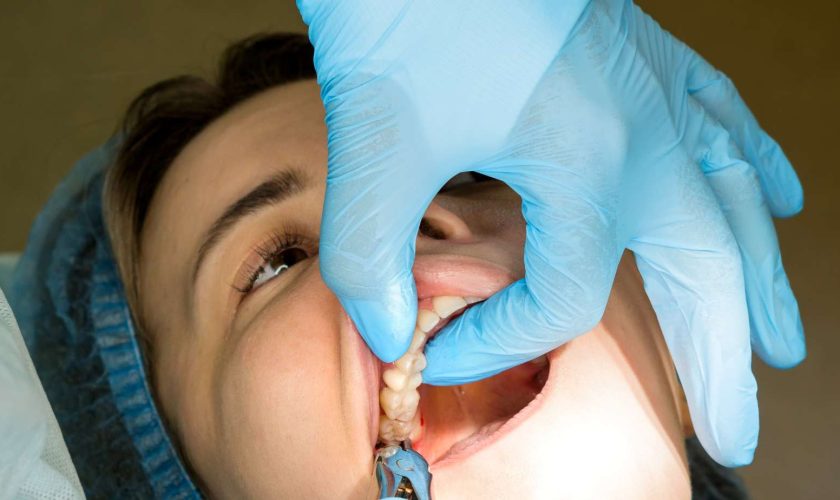
On the day of the procedure, the surgical team will ensure you are comfortable before beginning. Once the anaesthetic has taken effect, the surgeon makes a small incision in the gum tissue to expose the tooth and bone. In many cases, the tooth is divided into smaller sections to make it easier to remove through a smaller opening, which helps preserve the surrounding bone.

After the tooth is extracted, the site is cleaned of any debris. Stitches are often placed to promote healing; these are usually the dissolvable kind that disappear within a week or two. Gauze is placed over the extraction site to control initial bleeding and encourage the formation of a blood clot, which is vital for the healing process.

The First 24 Hours Post-Op

The immediate aftermath is focused on rest and clot preservation. You can expect some swelling and minor bruising, which usually peaks around the second or third day. Using ice packs on the outside of your jaw for 20-minute intervals can significantly reduce inflammation.

It is crucial to avoid “sucking” motions—this means no straws and no smoking—as the pressure can dislodge the blood clot, leading to a painful condition known as dry socket. Stick to a liquid or very soft diet and avoid any strenuous physical activity, as an elevated heart rate can increase bleeding at the surgical site.

Long-Term Recovery and Care

From the second day onwards, you can begin gentle saltwater rinses to keep the area clean. While you should continue brushing your other teeth, be incredibly mindful around the extraction zones. Most patients find they can return to work or school within 2 to 4 days, depending on the complexity of the extraction and their personal pain threshold.

Gradually reintroduce semi-soft foods like scrambled eggs or pasta as your jaw stiffness subsides. If you experience a sudden increase in pain, fever, or a foul taste in your mouth after the third day, contact your clinic immediately, as these can be signs of a secondary infection.

Navigating Potential Challenges

While the vast majority of wisdom teeth extractions are routine and successful, it is important to maintain realistic expectations. No surgery is entirely without peril, and being informed allows you to monitor your recovery more effectively. Like any surgical intervention involving bone and soft tissue, this procedure carries its own risks and complications including temporary nerve numbness or sinus communication.

By following your surgeon’s aftercare instructions to the letter and keeping up with your follow-up appointments, you ensure the best possible outcome for your long-term oral health. Addressing these “extra” teeth early often prevents a lifetime of orthodontic issues and chronic discomfort.

read more