
close

Fitness

Fitness

How to Build Muscle With Resistance Bands (Without Them Rolling Up)

Anyone who has tried adding resistance bands to their routine knows the exact frustration. You set up for a set of lateral walks or Romanian deadlifts, drop into position, and three reps in, your flat rubber band violently curls into a tight, pinching tourniquet. Instead of focusing on driving tension into your target muscles, you spend the entire set grimacing at pinched skin, stopping to unroll bunched latex, and losing all momentum.
Because of this constant hassle, many people dismiss bands as flimsy warm-up tools or rehab gear that cannot build real mass. That assumption is flat wrong. Resistance bands can stimulate significant muscle growth, provided you understand how to generate mechanical tension and solve the friction and equipment issues that derail your workouts.

The Mechanics of Building Muscle With Elastic Tension

Building muscle requires three primary drivers: mechanical tension, muscle damage, and metabolic stress. Free weights rely on gravity to create resistance, meaning the load remains static while the leverage changes throughout the range of motion. Resistance bands operate on accommodating resistance, meaning the load increases the further the band is stretched.
This dynamic presents both an advantage and a challenge for hypertrophy. The advantage is that bands often match your natural strength curve. When pressing or squatting, you are naturally stronger near the lockout than in the hole, and that is precisely where the band exerts its peak tension.
The challenge lies in the bottom of the movement. When you lower into a deep squat or stretch your hamstrings in a hinge, a resistance band often loses tension entirely. If your muscles experience zero resistance in the lengthened position, you leave substantial muscle growth on the table. To trigger hypertrophy with bands, you must set up the movement so there is always slight tension on the band even at the absolute bottom of the repetition.

Why Resistance Bands Roll and Slide

Before fixing the problem, it helps to understand why it happens. Rubber bands roll because of a simple physics issue involving surface friction and muscle shape.
Your limbs are not straight cylinders; they are tapered cones that expand and contract. When your quadriceps or glutes flex, the muscle belly expands outward. Thin latex possesses high elasticity but minimal structural rigidity. As the muscle shifts beneath it, the uneven tension pulls on the edge of the rubber. Once a tiny section folds over, the rest of the band instantly rolls toward the narrowest point of your limb to release shear stress.
Synthetic workout clothing worsens the issue. Slick spandex or polyester leggings offer almost zero traction, allowing latex to slip and bunch the second you move through a multi-planar pattern. Sweat on bare skin creates the opposite issue: localized sticking points that grab one edge of the band while the other edge slides, triggering an immediate roll.

Practical Fixes to Stop Bands From Rolling Up

Eliminating the roll does not require complicated hacks. It requires selecting the right tools for the movement pattern and adjusting where the band makes contact with your body.

Switch to Woven Fabric Loop Bands for Lower-Body Work

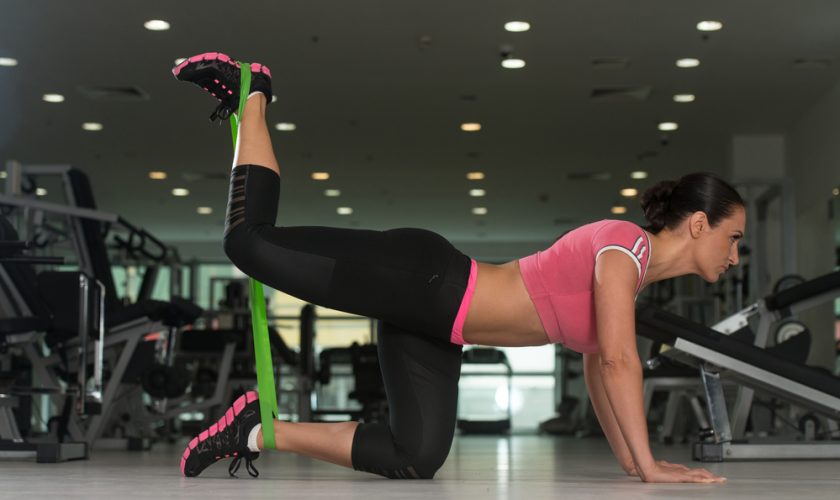
If you are using thin, translucent latex mini-bands around your thighs for squats, glute bridges, or abduction work, you are fighting an uphill battle. The single most effective upgrade you can make is switching to wide, woven fabric loop bands.
Fabric bands incorporate elastic threads woven directly into a heavy cloth blend, backed by inner silicone grip strips. Because the fabric has structural width that resists folding, it cannot collapse into a narrow string regardless of how aggressively your legs move. They do not pinch bare skin, and they grip slick gym leggings securely without sliding. Reserve thin latex bands for upper-body work like shoulder external rotations, face pulls, and pull-aparts where limb shapes are flatter and dynamic shifts are smaller.

Adjust Placement Away From Muscular Tapers

Where you place the band dictates how easily it rolls. Placing a mini-band directly across the thickest mid-point of your thigh guarantees it will slide downward toward the knee as soon as the quad contracts.
Instead, position the band either two inches above the knee joint or just below the knee at the upper calf. These areas provide stable anatomical shelves where the bone structure prevents the band from traveling. For hip hinge patterns, placing the band slightly lower down the calf maintains uniform outward pressure and keeps the material completely flat against the shins.

Maintain Continuous Lateral Pressure

Bands frequently roll during the transition between the concentric and eccentric phases because the user allows their knees or ankles to collapse inward. The momentary loss of tension causes the band to go slack, shift its position, and snap into a roll the moment tension returns. Keep outward abduction pressure throughout the entire repetition, actively pushing against the band even as you return to the starting position.

Lay 41-Inch Loop Bands Completely Flat Underfoot

For compound movements like good mornings, deadlifts, and overhead presses, lifters commonly use long 41-inch continuous loop bands. If you step onto a round or twisted band, the uneven base will rotate under your shoes and ride up toward your ankles.
Take three seconds to smooth the band out flat against the floor before stepping onto it with a shoulder-width stance. Stand directly on the center of the strap with the arches of your shoes so your body weight clamps the band firmly to the floor.

How to Program Bands for Maximum Muscle Growth

Once you eliminate equipment distractions, your focus must shift to training intensity. Because bands do not display weight numbers like iron plates, people often stop sets long before their muscles reach true fatigue.

Control the Negative Tempo

Bands want to snap back to their resting length. If you yield to that elastic snap, you skip the eccentric phase of the lift, which is critical for muscle damage and growth. Fight the band on the way down. Use a three-second eccentric tempo, forcing your muscle fibers to decelerate the band’s pull smoothly.

Exploit the Peak Contraction

Because tension peaks at full stretch, make the end range work for you. When performing rows, chest presses, or glute thrusts, hold the peak contraction for a solid two-count. Squeezing against the band’s maximum resistance recruits high-threshold motor units that are difficult to reach with momentum-heavy free weight training.

Train Closer to Failure

With heavy barbells, you might stop two reps shy of failure for safety reasons. With resistance bands, the risk of dropping a heavy load is gone. To stimulate the same hypertrophic response, push your work sets within one rep of technical failure, or even take them to complete muscular failure. Combine this with higher rep ranges, typically between twelve and twenty-five controlled repetitions, to maximize metabolic stress.
Resistance bands are far more than a warm-up novelty. When you choose wide fabric options that stay flat, lock your foot placements down, and demand rigorous tempo control on every rep, you transform simple elastic loops into an exceptionally versatile muscle-building system.

read more
Fitness

Boutique vs. Commercial Gyms: Which Membership Is Actually Worth It?

Stepping into a fitness facility today looks nothing like it did two decades ago. The fitness landscape used to be straightforward: you signed up at the local big-box facility, received a laminated keycard, and navigated aisles of identical selectorized machines on your own. Today, that conventional setup competes directly with neon-lit boutique studios that promise personalized coaching, tight-knit communities, and curated playlists designed to feel more like a nightclub than a workout space.
Yet, this shift comes with a staggering price gap. A standard commercial gym membership might run anywhere from $15 to $60 a month, while boutique fitness studios frequently charge $180 to $300 or more for unlimited access. Deciding which option justifies the investment comes down to how you train, what drives your consistency, and whether you are paying for actual utility or clever lifestyle branding.

The Commercial Gym: Maximum Variety and Unmatched Flexibility

Commercial gyms represent the workhorse of the industry. Brands like LA Fitness, Crunch, Lifetime, and Planet Fitness operate on high volume and extensive floor plans. Their core appeal lies in sheer square footage and self-directed autonomy.

What Makes Commercial Gyms Worth the Money

The primary advantage of a commercial gym is comprehensive equipment access. If your routine calls for heavy barbell work, cable crossover stations, specialized resistance machines, and twenty yards of turf, a commercial gym is often the only place where all of those tools exist under a single roof.
Beyond hardware, they offer complete scheduling freedom. You are never tied to a 6:00 AM class slot that penalizes you with a $15 late-cancellation fee if your alarm fails. You show up when your schedule permits, rest as long as you need between sets, and stay for forty minutes or two hours without anyone pushing you toward the exit. For self-motivated lifters, powerlifters, bodybuilders, and anyone working through a bespoke program, this independence is indispensable.

Where Commercial Gyms Fall Short

The business model of most big-box gyms relies on breakage, meaning they depend on selling thousands of memberships to people who rarely walk through the door. Because overhead is subsidized by ghost members, active facilities can become overcrowded during peak morning and evening hours. Waiting ten minutes for a squat rack or finding dumbbells scattered haphazardly across the turf is a standard reality of commercial training.
Furthermore, accountability is entirely your responsibility. The front-desk attendant will scan your badge, but no one will check in if you disappear for three weeks. If you struggle with exercise selection, form correction, or internal motivation, the vast open floor can easily feel aimless and overwhelming.

The Boutique Studio: Precision Programming and Built-In Drive

Boutique studios operate on the opposite philosophy. Instead of being an open playground with hundreds of options, a boutique space specializes in one specific training modality. Whether it is indoor cycling, high-intensity interval training, classical Pilates, or coached strength circuits, these studios strip away guesswork in exchange for a highly curated experience.

Why People Happily Pay Boutique Prices

The real product sold by boutique fitness is not just the workout itself, but outsourced mental energy. In a boutique setting, you do not design a split, count reps, select weights, or calculate rest intervals. You reserve a spot, show up, and follow instructions from a coach trained to keep the room engaged from warm-up to cool-down.
This structure drives consistency for individuals who find conventional gyms tedious. The presence of instructors, structured class times, and regular peers introduces an external social contract. When a coach learns your name and notices your absence, skipping a session carries a psychological cost that simply does not exist at a large health club.
The environment also matters. From high-end acoustic design and specialized lighting to pristine shower suites stocked with premium toiletries, boutique studios eliminate the grimy, utilitarian friction often associated with legacy gyms.

The Downside of Specialization

The most glaring limitation of the boutique model is structural restriction. If a studio focuses on spin or barre, you develop specific cardiovascular or muscular endurance, but you sacrifice raw strength development, sprint mechanics, and cross-planar athleticism.
Cost is another friction point that compounds quickly. If you want to supplement your cycle classes with heavy barbell lifting, you end up paying for a boutique membership on top of a baseline gym pass. Additionally, aggressive cancellation policies turn ordinary scheduling hiccups into unexpected financial penalties.

Comparing the True Costs and Return on Investment

Evaluating whether a membership is worth the investment requires looking past the monthly sticker price and calculating the cost per actual visit.
A $30-per-month commercial membership seems economical on paper, but if you only go twice a month due to a lack of direction or dread of crowds, you are effectively paying $15 per session. Conversely, an unlimited boutique membership priced at $200 per month yields a reasonable $12.50 per visit if you attend four times every week. An unused cheap membership is wasted money, whereas an expensive membership that drives relentless attendance represents functional value.
The return on investment also involves time efficiency. A class that starts promptly at 7:00 AM and concludes at 7:50 AM with zero equipment downtime lets busy professionals organize their workday with predictability. In contrast, navigating a packed commercial gym at 5:30 PM can easily turn a scheduled 45-minute lift into an inefficient 90-minute ordeal.

How to Choose the Right Setup for Your Goals

Your selection should align with your psychological profile as an athlete just as much as your personal budget.
Choose a commercial gym if you already know how to periodize your training, prefer lifting heavy free weights, need flexible hours, or enjoy working out in your own mental zone with headphones on. It is the superior platform for structured, long-term athletic independence.
Choose a boutique studio if you struggle with self-discipline, thrive on collective group energy, value premium amenities, and prefer to follow instructions rather than devise your own routines.
Many experienced fitness enthusiasts eventually settle on a hybrid strategy: maintaining an affordable low-cost tier at a reliable commercial gym for solitary strength work, while purchasing a limited five-pack or ten-pack class pass at a boutique studio to inject periodic intensity and variety into their routine.
The right fitness membership is never the one with the flashiest marketing or the lowest advertised rate. It is simply the environment that removes the most psychological resistance between you and regular physical exertion.
read more
Fitness

The Role of Instructor Cueing in Maximising Spin Class Outcomes

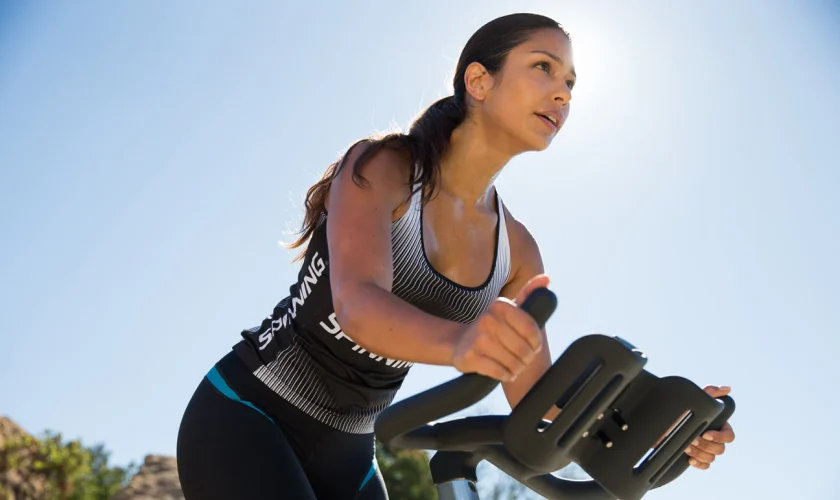
A spin class without skilled instructor cueing is simply a room full of people on stationary bikes with music playing. The instructor’s voice is the primary tool through which a group training session is transformed from an individual effort into a coached, structured experience that produces specific physiological adaptations. Yet the quality of cueing varies enormously across Singapore’s fitness landscape, and members who understand what good cueing sounds like are far better positioned to evaluate and benefit from the studios they choose.

The best spin studio Singapore experiences are distinguished as much by the quality of verbal instruction as by the quality of the equipment. These two variables are inseparable in determining what a member actually gets from a session.

What Cueing Actually Is

Cueing in a fitness context refers to verbal or visual instructions that guide movement, effort, or focus during a training session. In spin specifically, cueing operates across several dimensions simultaneously:

  • Technical cues that guide rider position, pedalling mechanics, and resistance management
  • Intensity cues that communicate the target effort level for each session segment
  • Motivational cues that maintain engagement and push effort during demanding segments
  • Safety cues that correct dangerous patterns or prevent injury in real time
  • Educational cues that explain the physiological purpose of what is being done

Excellent instructors deploy all five types of cueing purposefully throughout a session. Weaker instructors rely primarily on motivational cueing, which is the easiest to deliver but the least specifically useful for producing training outcomes.

Technical Cueing and Its Effect on Performance

Technical cues are the most directly performance-relevant type of instruction in a spin class. They address the mechanics of how force is applied to the pedals, how the rider’s body position is managed, and how resistance and cadence interact.

Common technical cues that improve performance include:

  • Pedalling in circles rather than pushing down: directing attention to the complete 360-degree pedal stroke rather than just the downstroke improves power application efficiency
  • Relaxing the upper body and grip: tension in the hands, arms, and shoulders wastes energy that should be directed to the legs
  • Hip position over the saddle: anterior pelvic tilt during climbing segments recruits the gluteal musculature more effectively, improving power output and reducing knee strain
  • Heel position through the pedal stroke: maintaining a flat or slightly heel-down foot position through the bottom of the stroke protects the Achilles tendon and improves force transmission

These cues are specific, actionable, and immediately applicable. A member who receives and applies them correctly during a session gets meaningfully more from the same physical effort than one who rides without this guidance.

The Timing and Delivery of Effective Cues

The timing of cues is as important as their content. A cue delivered at the wrong moment, during a music build before an intensity peak, for example, will be heard but not acted upon because the rider’s attention is focused on managing the upcoming effort change.

Effective instructors position technical cues during easier effort segments when riders have the attentional bandwidth to process and apply new information. Motivational cues are reserved for the peaks where attention is consumed by physical demand and technical instruction is less processable.

Delivery volume and clarity matter too. An instructor who cannot project clearly above the studio audio system cannot cue effectively regardless of instruction quality. This is one reason why professional audio installation and instructor microphone quality are not incidental concerns but functional requirements of a quality spin environment.

The Problem With Generic Motivational Cueing

Generic motivational cueing, phrases like “push through,” “you’ve got this,” and “dig deep,” is the default of underprepared spin instruction. It requires no technical knowledge, no understanding of what the body is doing at any given moment in the session, and no ability to adapt to the specific group in the room.

While motivational language has a place in driving effort during maximum intensity segments, a session composed primarily of this type of cueing fails to provide the technical guidance and educational context that separates a coached session from a high-energy background music experience.

Members who have trained under genuinely skilled instructors describe the difference clearly: they leave a well-cued session understanding what they did and why, having corrected technical patterns they were previously unaware of, and feeling that they extracted the maximum physiological value from their time in the studio.

Individual Attention in a Group Setting

One of the marks of a skilled group fitness instructor is the ability to provide individual-specific coaching within a class of 15 or 20 participants. This means observing individual riders during the class, identifying specific technical or intensity management issues, and delivering targeted cues without disrupting the group flow.

This requires an instructor who is genuinely watching the room rather than performing to the front, who can identify the specific rider needing correction from a quick scan, and who can deliver a directed cue naturally within the session’s verbal flow.

FAQ

How can I tell within the first few minutes whether an instructor is highly skilled?

Listen to the specificity of the opening technical instructions during bike setup and warm-up. An instructor who provides precise fit guidance, explains why each adjustment matters, and observes rider position during the warm-up is demonstrating a coaching orientation from the start. An instructor who plays music and delivers primarily motivational language from minute one is revealing their cueing ceiling early.

Should I ask the instructor for personal feedback after class?

Absolutely. Most skilled instructors welcome post-class questions and feedback conversations. Asking what specific adjustments would improve your technique or output is a direct way to access individual coaching beyond what group cueing can deliver.

What should I do if an instructor’s cues are contradicting each other or seem technically incorrect?

It is entirely appropriate to ask for clarification after class. Frame the question as a genuine desire to understand: “I noticed you cued X and then Y, could you help me understand how those two things work together?” A skilled instructor will welcome the question. A defensive response is itself informative about coaching quality.

Is there a way to improve how I apply instructor cues if I am new to spin?

Focus on one or two technical cues per session rather than trying to apply all instruction simultaneously. Identify the cue that addresses your most significant current limitation, apply it deliberately throughout the session, and add additional focus areas as each adjustment becomes automatic.

TFX Singapore develops instructors with a focus on technical cueing quality and individual coaching awareness, ensuring that every class delivers the specific guidance that produces genuine performance improvement rather than simply an energetic group experience.

read more