close

July 2026

Fitness

How to Build Muscle With Resistance Bands (Without Them Rolling Up)

Anyone who has tried adding resistance bands to their routine knows the exact frustration. You set up for a set of lateral walks or Romanian deadlifts, drop into position, and three reps in, your flat rubber band violently curls into a tight, pinching tourniquet. Instead of focusing on driving tension into your target muscles, you spend the entire set grimacing at pinched skin, stopping to unroll bunched latex, and losing all momentum.
Because of this constant hassle, many people dismiss bands as flimsy warm-up tools or rehab gear that cannot build real mass. That assumption is flat wrong. Resistance bands can stimulate significant muscle growth, provided you understand how to generate mechanical tension and solve the friction and equipment issues that derail your workouts.

The Mechanics of Building Muscle With Elastic Tension

Building muscle requires three primary drivers: mechanical tension, muscle damage, and metabolic stress. Free weights rely on gravity to create resistance, meaning the load remains static while the leverage changes throughout the range of motion. Resistance bands operate on accommodating resistance, meaning the load increases the further the band is stretched.
This dynamic presents both an advantage and a challenge for hypertrophy. The advantage is that bands often match your natural strength curve. When pressing or squatting, you are naturally stronger near the lockout than in the hole, and that is precisely where the band exerts its peak tension.
The challenge lies in the bottom of the movement. When you lower into a deep squat or stretch your hamstrings in a hinge, a resistance band often loses tension entirely. If your muscles experience zero resistance in the lengthened position, you leave substantial muscle growth on the table. To trigger hypertrophy with bands, you must set up the movement so there is always slight tension on the band even at the absolute bottom of the repetition.

Why Resistance Bands Roll and Slide

Before fixing the problem, it helps to understand why it happens. Rubber bands roll because of a simple physics issue involving surface friction and muscle shape.
Your limbs are not straight cylinders; they are tapered cones that expand and contract. When your quadriceps or glutes flex, the muscle belly expands outward. Thin latex possesses high elasticity but minimal structural rigidity. As the muscle shifts beneath it, the uneven tension pulls on the edge of the rubber. Once a tiny section folds over, the rest of the band instantly rolls toward the narrowest point of your limb to release shear stress.
Synthetic workout clothing worsens the issue. Slick spandex or polyester leggings offer almost zero traction, allowing latex to slip and bunch the second you move through a multi-planar pattern. Sweat on bare skin creates the opposite issue: localized sticking points that grab one edge of the band while the other edge slides, triggering an immediate roll.

Practical Fixes to Stop Bands From Rolling Up

Eliminating the roll does not require complicated hacks. It requires selecting the right tools for the movement pattern and adjusting where the band makes contact with your body.

Switch to Woven Fabric Loop Bands for Lower-Body Work

If you are using thin, translucent latex mini-bands around your thighs for squats, glute bridges, or abduction work, you are fighting an uphill battle. The single most effective upgrade you can make is switching to wide, woven fabric loop bands.
Fabric bands incorporate elastic threads woven directly into a heavy cloth blend, backed by inner silicone grip strips. Because the fabric has structural width that resists folding, it cannot collapse into a narrow string regardless of how aggressively your legs move. They do not pinch bare skin, and they grip slick gym leggings securely without sliding. Reserve thin latex bands for upper-body work like shoulder external rotations, face pulls, and pull-aparts where limb shapes are flatter and dynamic shifts are smaller.

Adjust Placement Away From Muscular Tapers

Where you place the band dictates how easily it rolls. Placing a mini-band directly across the thickest mid-point of your thigh guarantees it will slide downward toward the knee as soon as the quad contracts.
Instead, position the band either two inches above the knee joint or just below the knee at the upper calf. These areas provide stable anatomical shelves where the bone structure prevents the band from traveling. For hip hinge patterns, placing the band slightly lower down the calf maintains uniform outward pressure and keeps the material completely flat against the shins.

Maintain Continuous Lateral Pressure

Bands frequently roll during the transition between the concentric and eccentric phases because the user allows their knees or ankles to collapse inward. The momentary loss of tension causes the band to go slack, shift its position, and snap into a roll the moment tension returns. Keep outward abduction pressure throughout the entire repetition, actively pushing against the band even as you return to the starting position.

Lay 41-Inch Loop Bands Completely Flat Underfoot

For compound movements like good mornings, deadlifts, and overhead presses, lifters commonly use long 41-inch continuous loop bands. If you step onto a round or twisted band, the uneven base will rotate under your shoes and ride up toward your ankles.
Take three seconds to smooth the band out flat against the floor before stepping onto it with a shoulder-width stance. Stand directly on the center of the strap with the arches of your shoes so your body weight clamps the band firmly to the floor.

How to Program Bands for Maximum Muscle Growth

Once you eliminate equipment distractions, your focus must shift to training intensity. Because bands do not display weight numbers like iron plates, people often stop sets long before their muscles reach true fatigue.

Control the Negative Tempo

Bands want to snap back to their resting length. If you yield to that elastic snap, you skip the eccentric phase of the lift, which is critical for muscle damage and growth. Fight the band on the way down. Use a three-second eccentric tempo, forcing your muscle fibers to decelerate the band’s pull smoothly.

Exploit the Peak Contraction

Because tension peaks at full stretch, make the end range work for you. When performing rows, chest presses, or glute thrusts, hold the peak contraction for a solid two-count. Squeezing against the band’s maximum resistance recruits high-threshold motor units that are difficult to reach with momentum-heavy free weight training.

Train Closer to Failure

With heavy barbells, you might stop two reps shy of failure for safety reasons. With resistance bands, the risk of dropping a heavy load is gone. To stimulate the same hypertrophic response, push your work sets within one rep of technical failure, or even take them to complete muscular failure. Combine this with higher rep ranges, typically between twelve and twenty-five controlled repetitions, to maximize metabolic stress.
Resistance bands are far more than a warm-up novelty. When you choose wide fabric options that stay flat, lock your foot placements down, and demand rigorous tempo control on every rep, you transform simple elastic loops into an exceptionally versatile muscle-building system.
read more
Exercises

The Desk Worker’s Guide to Fixing “Dead Butt Syndrome” (Glute Amnesia)

You stand up after eight straight hours of spreadsheet duty or back-to-back Zoom calls, and something feels off. Your lower back feels compressed, your hip flexors feel like taut guitar strings, and walking to the kitchen feels strangely disconnected. If your hips feel stiff and your rear feels completely numb, you are experiencing the physiological fallout of what physical therapists colloquially call “dead butt syndrome,” or clinically, gluteal amnesia.
The term sounds humorous, but the functional consequences are anything but trivial. Your glutes are not literally dying; rather, your nervous system has temporarily dialed down the communication lines running to them. When the largest muscle group in your body goes on an unannounced strike, every other structure above and below the pelvis is forced to take on loads they were never designed to bear.

What Glute Amnesia Actually Means

Glute amnesia is fundamentally a neuromuscular issue rather than a structural deformity. When you spend hours seated in an office chair, your hips remain locked at a ninety-degree angle. In this position, the muscles at the front of your hips—the psoas and iliacus—remain in a chronically shortened, contracted state.
Under the rules of human biomechanics, when a muscle on one side of a joint contracts, the nervous system automatically sends an inhibitory signal to the muscle on the opposite side to relax and lengthen. This protective neurological mechanism is known as reciprocal inhibition. Because your hip flexors are held in a shortened state all day, your brain actively suppresses the motor units in your gluteus maximus, medius, and minimus.
Add the fact that the chair seat creates constant physical compression, reducing capillary blood flow and dulling sensory feedback, and the brain simply forgets to prioritize the glutes. When you finally stand up, your brain defaults to alternative movement strategies, recruiting your hamstrings and lower back erectors to handle hip extension instead.

The 30-Second At-Home Diagnostic

Before attempting to fix the issue, you need to establish whether your glutes are actually firing in the correct sequence. A simple single-leg bridge test will quickly reveal where your nervous system is routing tension.
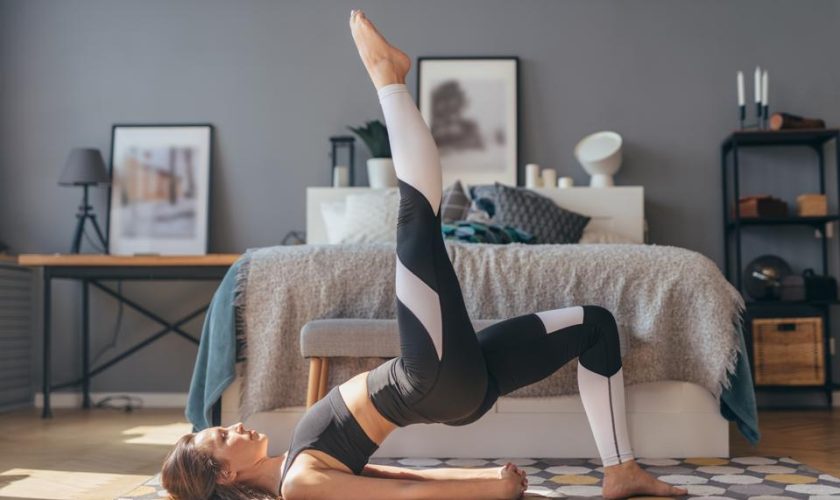
Lie flat on your back with your knees bent and your feet flat on the floor, about hip-width apart. Extend your right leg straight out so it hovers in the air, leaving only your left foot planted. Place your left hand directly on your left buttock. Now, drive through your left heel to lift your hips toward the ceiling until your thigh aligns with your torso.
Pay close attention to where you feel the initial strain:
  • If the primary sensation is an intense cramp or tight pulling in the back of your left thigh, your hamstrings have taken over.
  • If you feel an uncomfortable arching or pinching sensation across your lower back, your lumbar spine is hyperextending to fake hip extension.
  • If you feel a solid, firm contraction across the meat of your buttock with zero strain in your back, your motor recruitment pattern is working properly.
If either your hamstring or lower back fired first, your brain has lost direct neuromuscular control over that hip extensor.

Step 1: Release the Front to Wake Up the Back

You cannot successfully activate a muscle if its opposing partner refuses to yield. Trying to strengthen your glutes without first restoring length to your hip flexors is like pressing the gas pedal while holding down the emergency brake.
To unlock the front of your hips, perform a targeted half-kneeling hip flexor mobilization. Kneel on a soft mat on your right knee, with your left foot flat in front of you at a ninety-degree angle. Most people make the mistake of lunging as far forward as possible, which merely arches the lumbar spine and misses the target tissue entirely.
Instead, stay completely tall. Actively tuck your pelvis underneath you—think of flattening your lower back and curling your tailbone forward into a posterior pelvic tilt. From that locked position, gently shift your entire torso forward just two or three inches until you feel a deep, distinct stretch in the front of your right hip and upper thigh. Hold this position for forty-five seconds while taking deep diaphragmatic breaths, then switch sides. Once the hip flexors yield their grip, the glutes finally have the mechanical clearance to contract.

Step 2: Targeted Re-Activation Drills

Once the hip flexors are relaxed, your next objective is to rebuild the neural pathway between your motor cortex and your gluteal fibers using controlled, low-velocity movements.

The Iso-Hold Glute Bridge with Tactile Feedback

Lie on your back with your knees bent and feet planted flat, keeping your toes pointing straight ahead. Before lifting your hips, brace your abdominal wall as if preparing to take a punch. Drive through your heels, lift your hips until your pelvis forms a straight line from your knees to your shoulders, and aggressively squeeze your glutes at the top.
Tap your glutes with your fingertips. Physical touch provides tactile biofeedback, helping your brain locate and recruit the specific muscle fibers you are trying to target. Hold the peak contraction for a full five seconds before lowering down under control. Complete two sets of eight repetitions, focusing entirely on contraction quality over speed.

Side-Lying Clamshells for Hip Stability

The gluteus medius sits on the outer edge of your hip and is responsible for stabilizing your pelvis when you walk, run, or climb stairs. When it falls asleep, your knees tend to collapse inward, creating chronic knee and foot strain.
Lie on your side with your hips and knees bent at roughly forty-five degrees, keeping your feet glued together. Roll your top hip slightly forward to ensure you do not compensate with your lower back. Keeping your heels touching, raise your top knee as high as you can without letting your pelvis rock backward. Pause for two seconds at the top, feeling the burn on the outside of your upper hip, and lower slowly. Perform fifteen controlled repetitions per side.

Integrating Movement into the Workday

Rebuilding motor control does not require hours of dedicated gym time; it requires consistent, low-level interruption of static postures throughout the working day.
First, adjust your office chair so your hips sit slightly higher than your knees. When your knees sit higher than your hip sockets, anterior hip compression increases dramatically, accelerating reciprocal inhibition.
Second, turn standing up into a micro-exercise. Instead of folding forward and using your lower back and quads to push yourself up, slide your feet beneath you, hinge forward at the hips while keeping your spine neutral, and drive forcefully through your heels. Squeeze your glutes firmly for two seconds once you reach a standing position. Doing this every time you get up for water or a phone call translates into dozens of daily neuromuscular rehearsals.
Fixing glute amnesia comes down to breaking up long stretches of immobility and re-establishing intentional neural connections. By systematically releasing your hip flexors, cueing the glutes with deliberate activation exercises, and standing with conscious intent, you can eliminate midday back stiffness and restore natural, pain-free movement.
Meta Title: How to Fix Glute Amnesia: The Desk Worker’s Guide
Meta Description: Learn how prolonged sitting causes “dead butt syndrome,” take a 30-second self-test, and follow simple mobility exercises to reactivate dormant glutes.
read more
Fitness

Boutique vs. Commercial Gyms: Which Membership Is Actually Worth It?

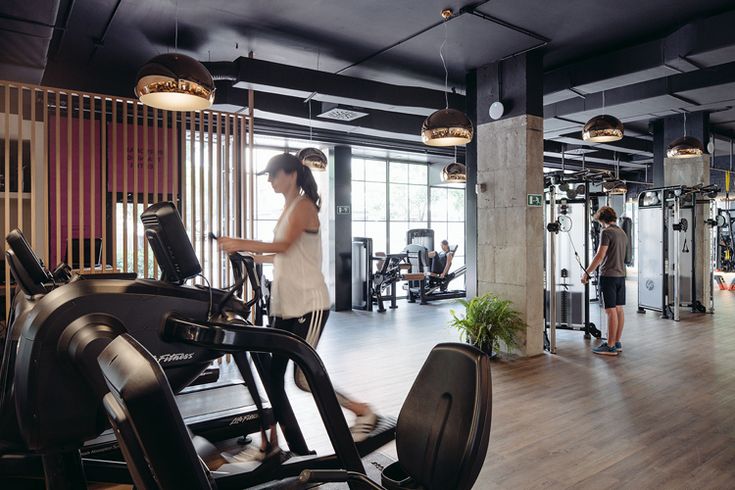
Stepping into a fitness facility today looks nothing like it did two decades ago. The fitness landscape used to be straightforward: you signed up at the local big-box facility, received a laminated keycard, and navigated aisles of identical selectorized machines on your own. Today, that conventional setup competes directly with neon-lit boutique studios that promise personalized coaching, tight-knit communities, and curated playlists designed to feel more like a nightclub than a workout space.
Yet, this shift comes with a staggering price gap. A standard commercial gym membership might run anywhere from $15 to $60 a month, while boutique fitness studios frequently charge $180 to $300 or more for unlimited access. Deciding which option justifies the investment comes down to how you train, what drives your consistency, and whether you are paying for actual utility or clever lifestyle branding.

The Commercial Gym: Maximum Variety and Unmatched Flexibility

Commercial gyms represent the workhorse of the industry. Brands like LA Fitness, Crunch, Lifetime, and Planet Fitness operate on high volume and extensive floor plans. Their core appeal lies in sheer square footage and self-directed autonomy.

What Makes Commercial Gyms Worth the Money

The primary advantage of a commercial gym is comprehensive equipment access. If your routine calls for heavy barbell work, cable crossover stations, specialized resistance machines, and twenty yards of turf, a commercial gym is often the only place where all of those tools exist under a single roof.
Beyond hardware, they offer complete scheduling freedom. You are never tied to a 6:00 AM class slot that penalizes you with a $15 late-cancellation fee if your alarm fails. You show up when your schedule permits, rest as long as you need between sets, and stay for forty minutes or two hours without anyone pushing you toward the exit. For self-motivated lifters, powerlifters, bodybuilders, and anyone working through a bespoke program, this independence is indispensable.

Where Commercial Gyms Fall Short

The business model of most big-box gyms relies on breakage, meaning they depend on selling thousands of memberships to people who rarely walk through the door. Because overhead is subsidized by ghost members, active facilities can become overcrowded during peak morning and evening hours. Waiting ten minutes for a squat rack or finding dumbbells scattered haphazardly across the turf is a standard reality of commercial training.
Furthermore, accountability is entirely your responsibility. The front-desk attendant will scan your badge, but no one will check in if you disappear for three weeks. If you struggle with exercise selection, form correction, or internal motivation, the vast open floor can easily feel aimless and overwhelming.

The Boutique Studio: Precision Programming and Built-In Drive

Boutique studios operate on the opposite philosophy. Instead of being an open playground with hundreds of options, a boutique space specializes in one specific training modality. Whether it is indoor cycling, high-intensity interval training, classical Pilates, or coached strength circuits, these studios strip away guesswork in exchange for a highly curated experience.

Why People Happily Pay Boutique Prices

The real product sold by boutique fitness is not just the workout itself, but outsourced mental energy. In a boutique setting, you do not design a split, count reps, select weights, or calculate rest intervals. You reserve a spot, show up, and follow instructions from a coach trained to keep the room engaged from warm-up to cool-down.
This structure drives consistency for individuals who find conventional gyms tedious. The presence of instructors, structured class times, and regular peers introduces an external social contract. When a coach learns your name and notices your absence, skipping a session carries a psychological cost that simply does not exist at a large health club.
The environment also matters. From high-end acoustic design and specialized lighting to pristine shower suites stocked with premium toiletries, boutique studios eliminate the grimy, utilitarian friction often associated with legacy gyms.

The Downside of Specialization

The most glaring limitation of the boutique model is structural restriction. If a studio focuses on spin or barre, you develop specific cardiovascular or muscular endurance, but you sacrifice raw strength development, sprint mechanics, and cross-planar athleticism.
Cost is another friction point that compounds quickly. If you want to supplement your cycle classes with heavy barbell lifting, you end up paying for a boutique membership on top of a baseline gym pass. Additionally, aggressive cancellation policies turn ordinary scheduling hiccups into unexpected financial penalties.

Comparing the True Costs and Return on Investment

Evaluating whether a membership is worth the investment requires looking past the monthly sticker price and calculating the cost per actual visit.
A $30-per-month commercial membership seems economical on paper, but if you only go twice a month due to a lack of direction or dread of crowds, you are effectively paying $15 per session. Conversely, an unlimited boutique membership priced at $200 per month yields a reasonable $12.50 per visit if you attend four times every week. An unused cheap membership is wasted money, whereas an expensive membership that drives relentless attendance represents functional value.
The return on investment also involves time efficiency. A class that starts promptly at 7:00 AM and concludes at 7:50 AM with zero equipment downtime lets busy professionals organize their workday with predictability. In contrast, navigating a packed commercial gym at 5:30 PM can easily turn a scheduled 45-minute lift into an inefficient 90-minute ordeal.

How to Choose the Right Setup for Your Goals

Your selection should align with your psychological profile as an athlete just as much as your personal budget.
Choose a commercial gym if you already know how to periodize your training, prefer lifting heavy free weights, need flexible hours, or enjoy working out in your own mental zone with headphones on. It is the superior platform for structured, long-term athletic independence.
Choose a boutique studio if you struggle with self-discipline, thrive on collective group energy, value premium amenities, and prefer to follow instructions rather than devise your own routines.
Many experienced fitness enthusiasts eventually settle on a hybrid strategy: maintaining an affordable low-cost tier at a reliable commercial gym for solitary strength work, while purchasing a limited five-pack or ten-pack class pass at a boutique studio to inject periodic intensity and variety into their routine.
The right fitness membership is never the one with the flashiest marketing or the lowest advertised rate. It is simply the environment that removes the most psychological resistance between you and regular physical exertion.
read more