The day your braces come off is supposed to be a celebration. You picture running your tongue over smooth, perfectly straight teeth and seeing a bright, uniform smile in the mirror. For too many orthodontic patients, however, that reveal comes with an unwelcome shock: pale, chalky frames or dull yellow outlines marking the exact spot where each bracket sat for the past two years.
These marks, often called bracket halos, are among the most common complications of orthodontic treatment. The hardware that straightens your teeth also creates hundreds of tiny ledges, corners, and crevices where plaque loves to hide. Preventing those discolored borders does not mean you have to maintain an impossible standard of perfection. It simply requires understanding how enamel breaks down around brackets and building a daily routine that actively defends those vulnerable margins.
White Spot Lesions vs. Surface Stains: Knowing the Real Culprit
When people talk about braces stains, they usually lump two very different problems into the same category. Understanding which one you are fighting determines how you protect your teeth.
Surface stains are extrinsic. They come from dark pigments in coffee, black tea, marinara sauce, red wine, and berries soaking into the sticky film of plaque that settles along the edges of your brackets. While surface stains look unattractive, a dental hygienist can usually polish them away with professional equipment once your hardware is removed.
The far more serious threat is decalcification, which creates permanent white spot lesions. These chalky, opaque patches are not surface discolorations. They represent the earliest stage of tooth decay. When plaque sits undisturbed around bracket borders, the bacteria inside it consume leftover sugars and produce continuous bursts of lactic acid. That acid leaches vital minerals like calcium and phosphate straight out of the enamel. Once the mineral lattice beneath the surface becomes porous, light reflects through it differently, leaving behind an indelible white scar. If left unchecked, these lesions eventually collapse into full cavities.
The Whitening Mistake That Makes Discoloration Worse
When patients notice slight yellowing or shadowing around their braces, their first impulse is often to reach for whitening strips, bleaching pens, or abrasive charcoal toothpastes. This is one of the worst mistakes you can make during active orthodontic treatment.
Whitening products only penetrate the exposed tooth structure. The square of enamel resting beneath the composite bonding resin holding your bracket is completely shielded from the bleaching agent. If you whiten your teeth while wearing braces, you create a two-tone checkerboard effect. The exposed surfaces will lighten, but when the orthodontist removes the brackets, the enamel underneath will remain its original, darker shade.
Furthermore, many commercial whitening toothpastes rely on coarse abrasives to scrub away surface film. On braced teeth, these abrasive particles scratch the edges of resin cement, wear down clear ceramic brackets, and create microscopic grooves in the enamel where new plaque can anchor even more aggressively. Put the whitening products in a drawer until your treatment is completely finished.
The Two-Angle Brushing Technique
A standard back-and-forth brushing motion is almost useless against orthodontic hardware. Flat bristles simply glide across the top faces of the brackets, completely missing the narrow corridors between the brackets and the gumline. To clean the margins where demineralization actually happens, you must alter your approach.
Hold your soft-bristled or electric toothbrush at a 45-degree angle pointing downward toward the top of the bracket, right along the gumline. Use small, circular vibrations to work the bristle tips under the archwire and against the upper edge of the bracket base. Once you have cleared the top perimeter of every tooth, switch the brush to a 45-degree angle pointing upward from the biting edge. This angle forces the bristles beneath the lower margin of the bracket, where food debris tends to drop and collect after meals.
Dedicate at least two full minutes to this process morning and night. If you use a manual toothbrush, consider switching to an oscillating electric model designed with an orthodontic brush head. The high-speed rotation generates fluid dynamics that help flush out sticky biofilm from spaces that standard nylon bristles cannot physically reach.
Essential Tools Beyond the Standard Toothbrush
Even the best brushing technique cannot clear every pocket of plaque around brackets and wires. If you want to keep your enamel pristine, your daily kit needs a few supplementary tools.
The Interdental Proxabrush
An interdental brush looks like a miniature pipe cleaner on a thin plastic handle, and it is the single most effective tool for preventing bracket halos. Slide the proxabrush vertically beneath the archwire between each bracket, brushing up and down against the sides of the metal. Doing this sweeps away the stubborn, glue-like plaque that sits directly against the adhesive perimeter, an area normal brush heads consistently bridge right over.
Hydrostatic Flushing vs. Traditional String
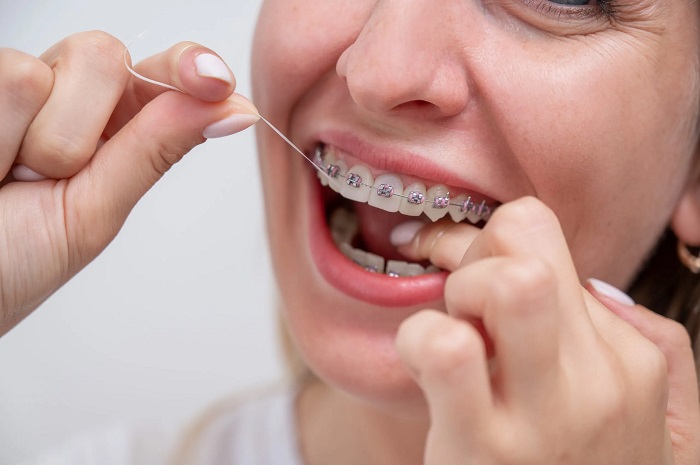
Many patients abandon flossing entirely once braces are placed because threading string around thirty brackets feels exhausting. While a water flosser is a fantastic addition to your routine, it is not a complete replacement for manual flossing. A water flosser uses pressurized pulses to dislodge large food chunks and dilute bacterial colonies around the gingival margin, but it cannot exert the mechanical friction required to wipe away sticky biofilm. Combine both methods: use a water flosser after meals for quick cleanup, and use a dedicated orthodontic floss threader or stiff-ended floss pick once every night before bed.
Remineralizing Your Enamel From the Outside In
Because plaque acid constantly pulls minerals out of your enamel, your daily hygiene routine must actively put those minerals back. You cannot reverse a full cavity, but you can remineralize early microscopic demineralization before it turns into an irreversible white scar.
Incorporate an alcohol-free sodium fluoride mouthwash into your daily regimen, preferably right before bed. Rinse thoroughly for one full minute after brushing, and spit the excess out without immediately following it with water. Leaving a light residual film of fluoride on your teeth allows the mineral ions to integrate directly into the crystalline enamel structure overnight, forming a acid-resistant shield known as fluorapatite.
For patients at high risk of staining or decalcification, talk to your dentist or orthodontist about prescription-strength pastes containing 5,000 parts per million fluoride, or remineralizing agents featuring nano-hydroxyapatite. Nano-hydroxyapatite particles are biochemically identical to natural tooth structure, allowing them to physically slot into microscopic enamel fissures and restore surface density around vulnerable bracket borders.
How Dietary Timing Protects Bracket Margins
Most orthodontic dietary advice focuses on avoiding hard, crunchy foods that snap brackets off the teeth. However, preventing stains is much more about the frequency of your eating habits than avoiding hard crusts.
Every time you consume fermentable carbohydrates or acidic drinks, the pH in your mouth plummets below 5.5, triggering active demineralization. It takes your saliva roughly twenty to thirty minutes of natural buffering to restore a neutral pH. If you sip an iced caramel macchiato, a sports drink, or a flavored sparkling water at your desk across four hours, your teeth spend that entire morning submerged in a destructive acid bath.
Consolidate your treats into short meal windows rather than grazing throughout the day. When you finish an acidic drink or snack, immediately rinse your mouth with plain tap water to wash away lingering sugars and neutralize the environment. Crucially, wait at least thirty minutes before brushing after consuming something acidic. Acid temporarily softens the outer micro-layer of enamel; scrubbing that softened surface immediately with a toothbrush will strip away enamel faster than plaque ever could.
Catching Changes Before Debonding Day
Keep a close eye on your bracket perimeters in a well-lit mirror once a week. If you notice chalky matte borders, persistent bleeding along the gums, or dull discoloration creeping around the edges of your hardware, bring it up at your next adjustment visit. Your orthodontist can apply an in-office fluoride varnish to halt the progression of early lesions before they deepen.
Never skip your regular cleanings with your general family dentist while wearing braces. Orthodontists focus on the mechanics of bone remodeling and tooth alignment; your dental hygienist remains your front-line defender for scaling away stubborn tartar, assessing gum health, and ensuring that the straight smile you reveal on debonding day is clean, healthy, and uniformly bright